First, let's take a look at how to create a key:
First, make sure the key you're creating isn't already in use in the game; otherwise, it might not work. (For example, don't use “R,” which is already used to rotate a piece of furniture in the game.)
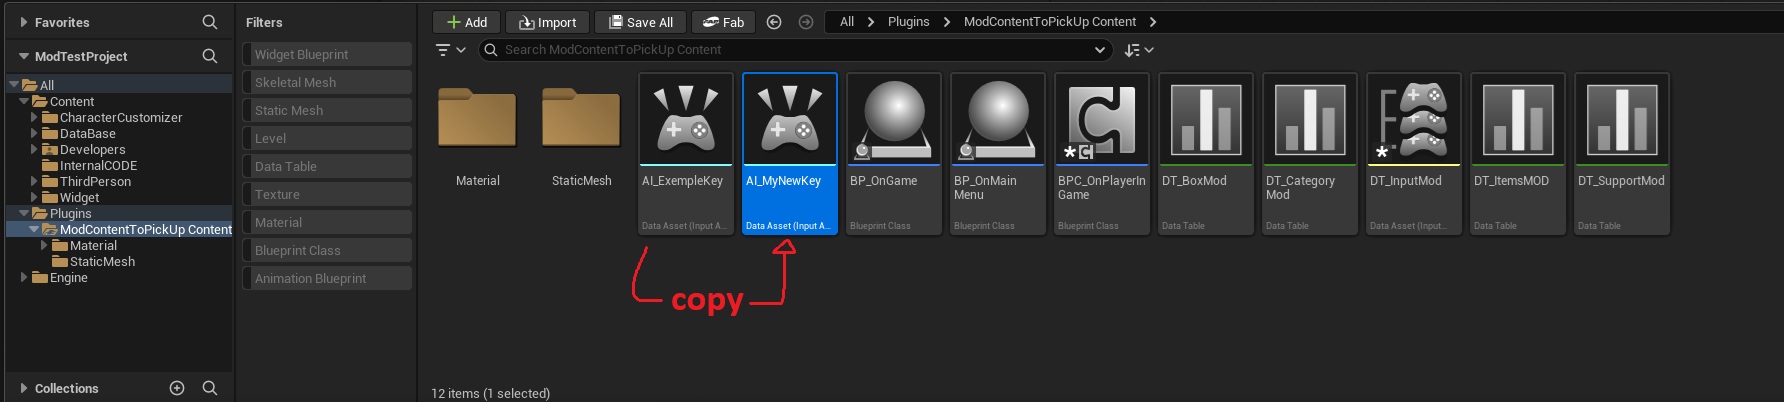
In the root directory of your mod, there is a file called “AI_ExempleKey”, you can copy the exemple key and past it into the same folder, then rename it whatever you want. (This will be the name of your action).
Warning: Please do not place this file anywhere other than the root directory of your mods. For some strange reason, it only works in the mod's root directory.
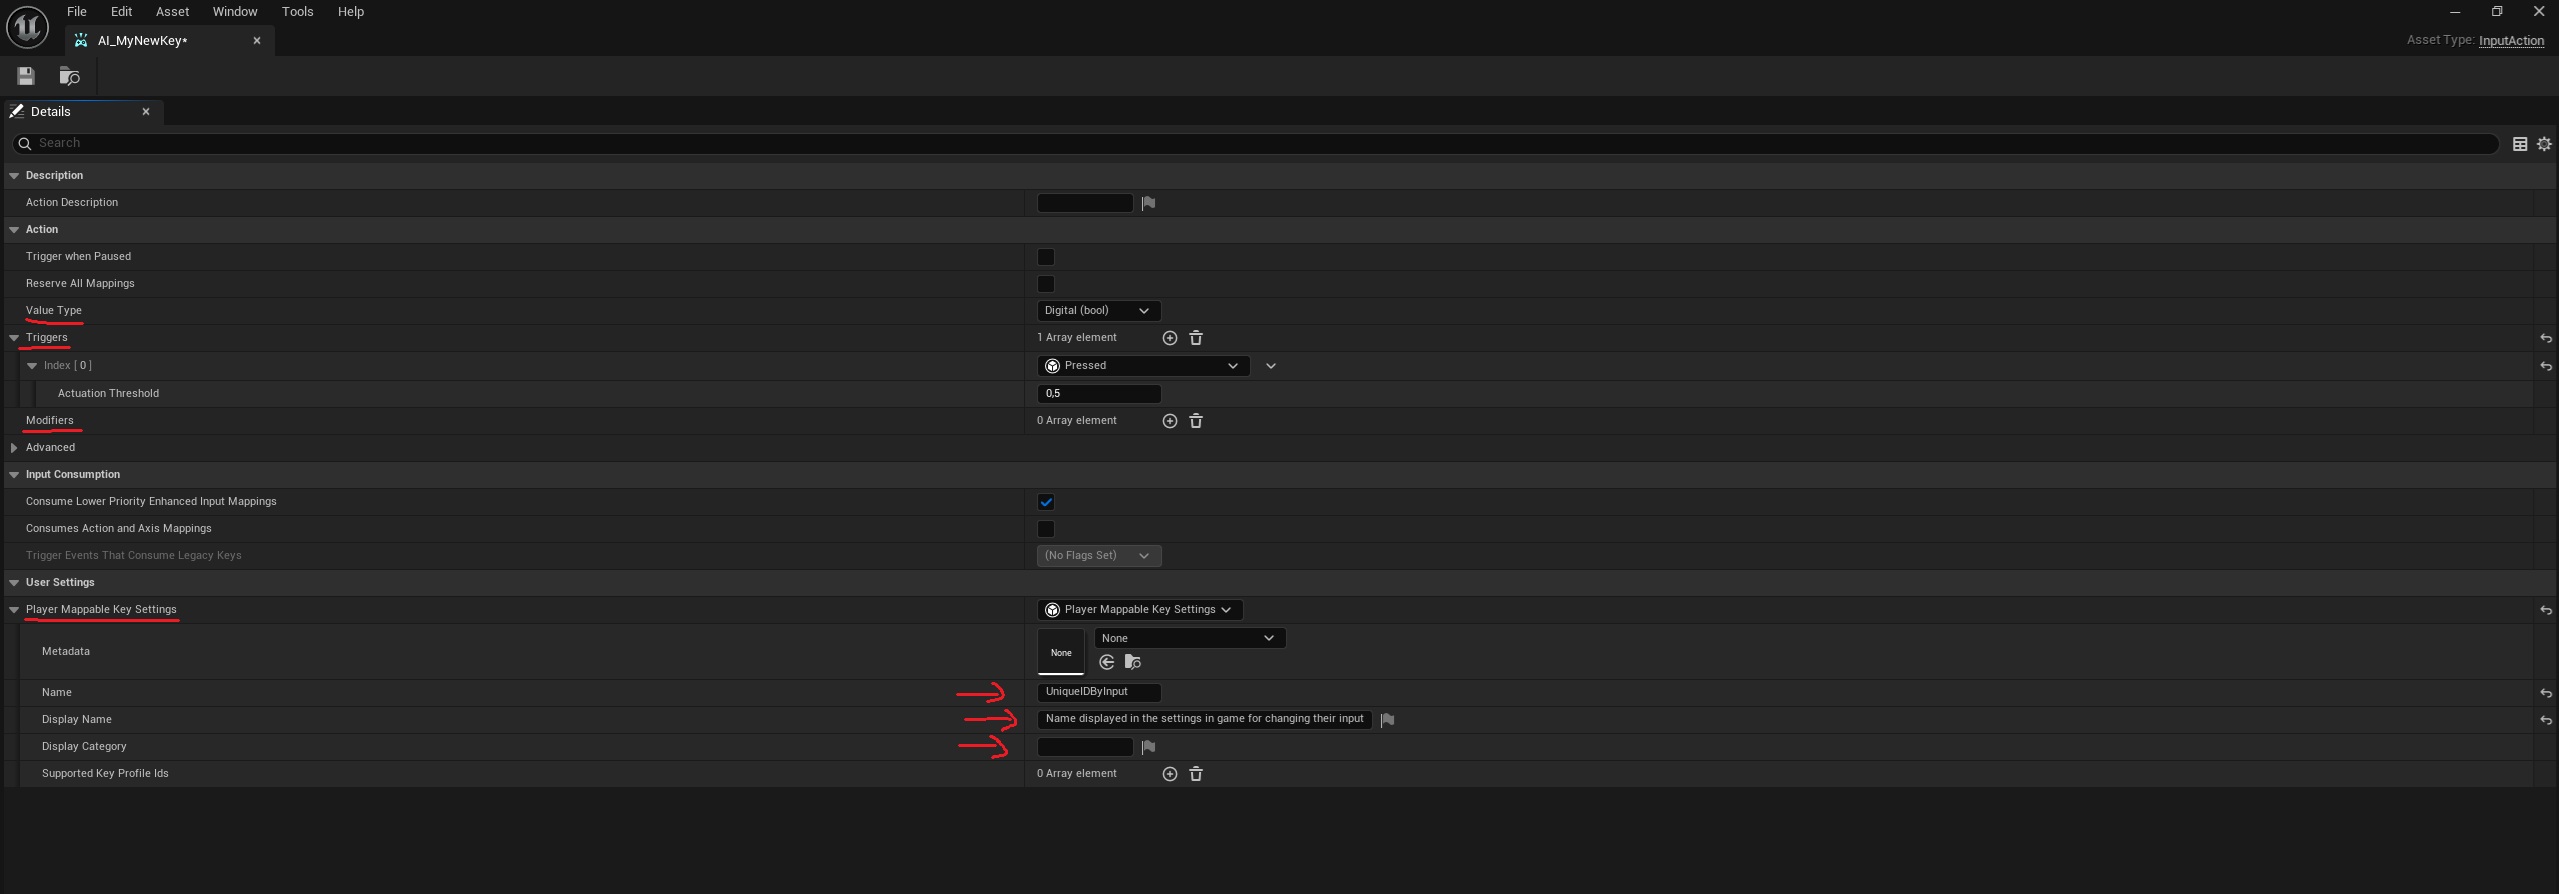
Once it's created, we'll adjust a few details to meet your needs, first open the file you've created:
Value type: This variable offers four options:
Triggers: This variable specifies the type of trigger that will cause the event associated with this key to be executed. Here are a few examples:
Modifiers: Modifies the result of the value type based on the modifiers used (you can assign multiple modifiers to a single key). Here are a few examples of modifiers:
Modifiers are rarely useful here, but they might come in handy in the next step, in the “DT_InputMod” function, which uses the input keys you're currently creating. Modifiers can be overridden for a specific key, which is useful if a key represents a specific value for an action and you have a different key for the same action that modifies that value.
Player Mappable Key Settings: This setting must be set to the “Player Mappable Key Settings” option, after which additional options will appear at the bottom. Here's how to configure them:
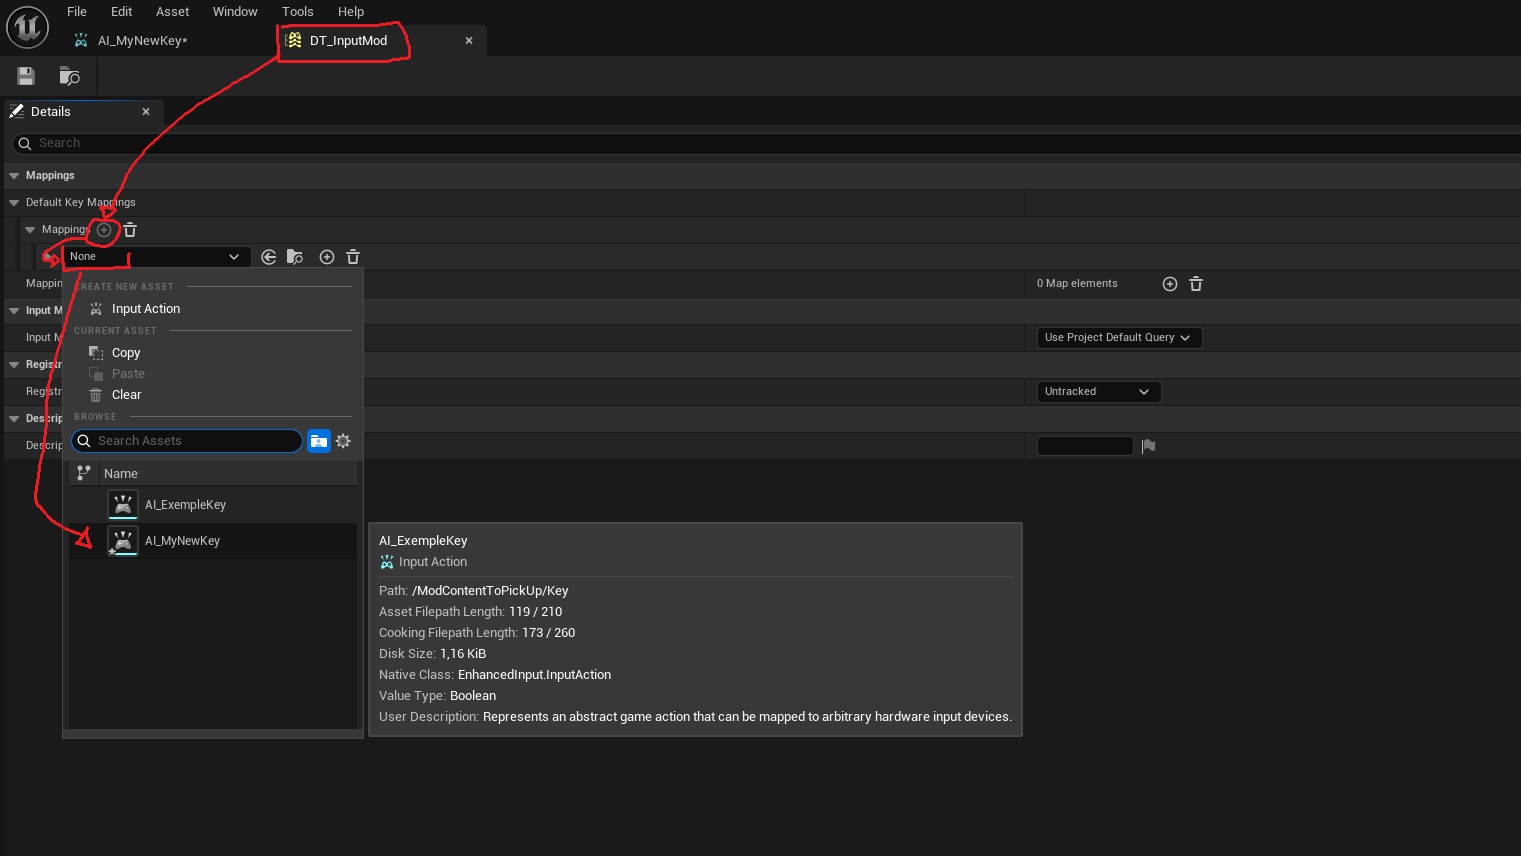
Once you've configured the input key, you can open “DT_InputMod” and then add the key you created under Default Key Mappings > Mappings > the “+”
Then, once you've added your key, you can choose the key or keys on the keyboard or controller that trigger your action.
(Click the “+” to the right of your key to add a second associated keyboard key)
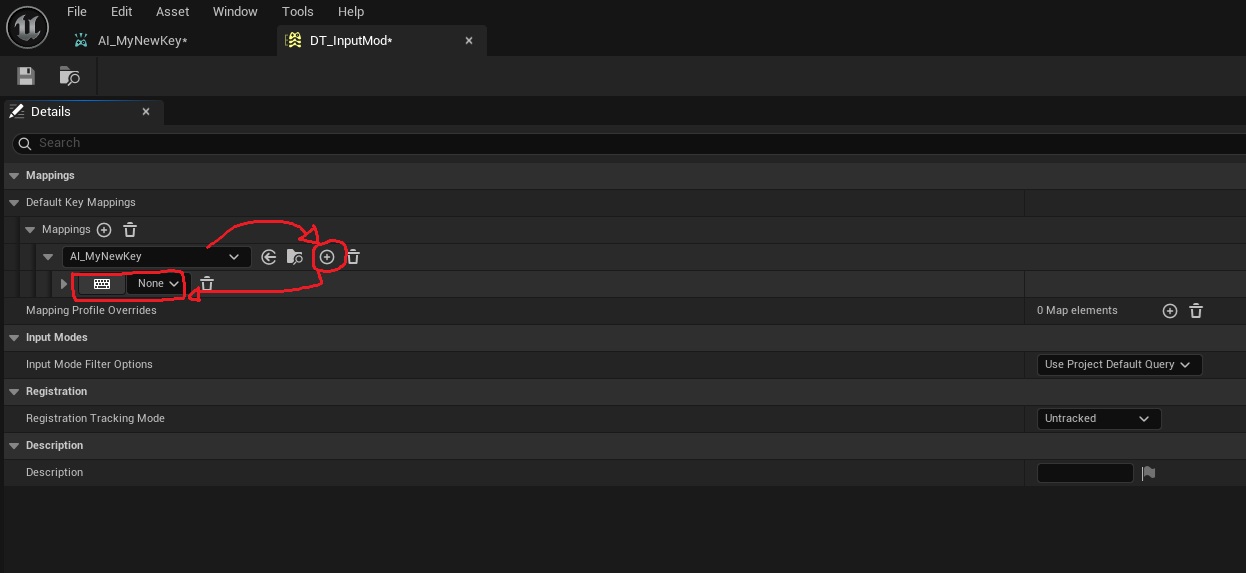
And there you go! Your key is now created! Now let's take a look at how to use and execute code when this key/action is triggered.
You can open the ‘BPC_OnPlayerInGame’ file, right-click in the empty space, and add “THE ACTION NAME YOU CREATED,” for example, “AI_MyNewKey.” Then click on the option indicated by an arrow.
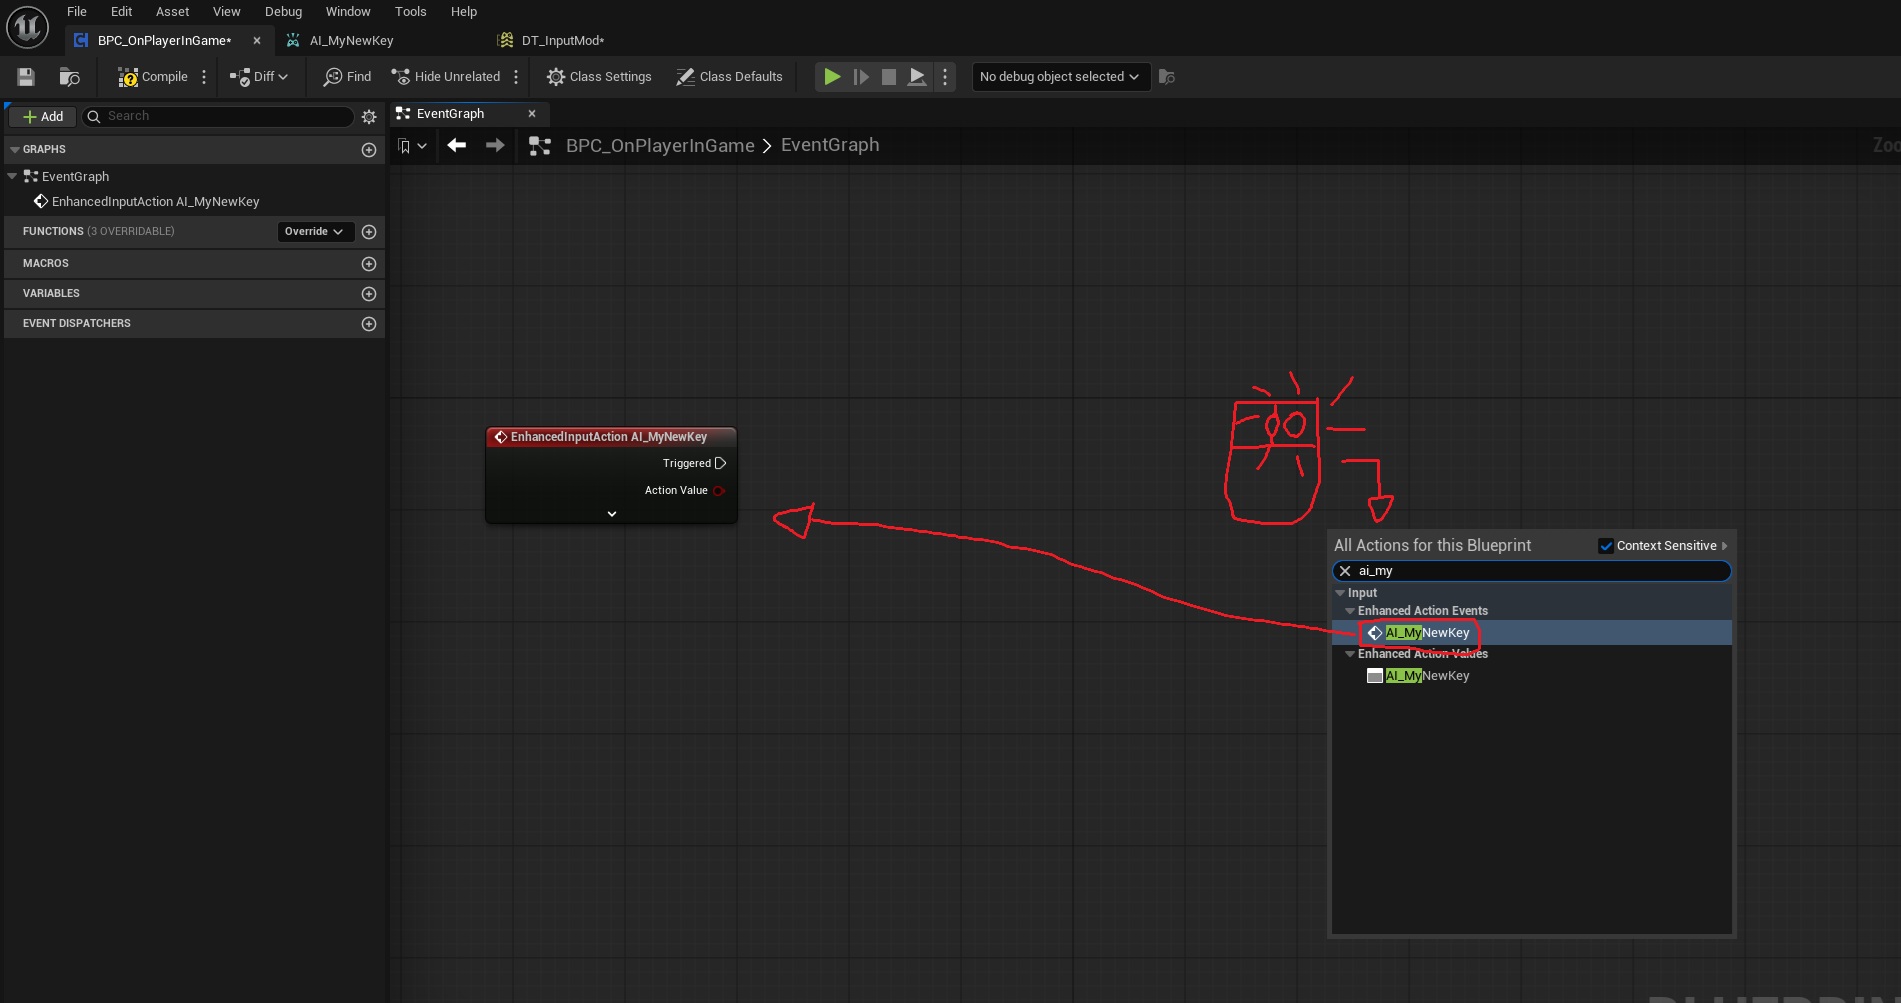
And there you go! The event will execute the code after the white line every time your key is trigger! (For example, in the code below, I create a cable at the player's location as soon as the key is trigger.)