In this tutorial, we'll learn how to create an image from a 3D model, which will be used for the product previews in the store menu.
First, we'll open the "CreateImage" folder of your plugin. Then, open "Debug_RenderUtilities_2" and modify the DataTable variable to reference the data named “DT_ItemsMOD,” that you copied.
(Please note that there may be several “DT_ItemsMOD” entries in the list. To ensure you're selecting the one you just copied, please verify the path in the list like the picture, the path must be your plugin name.).
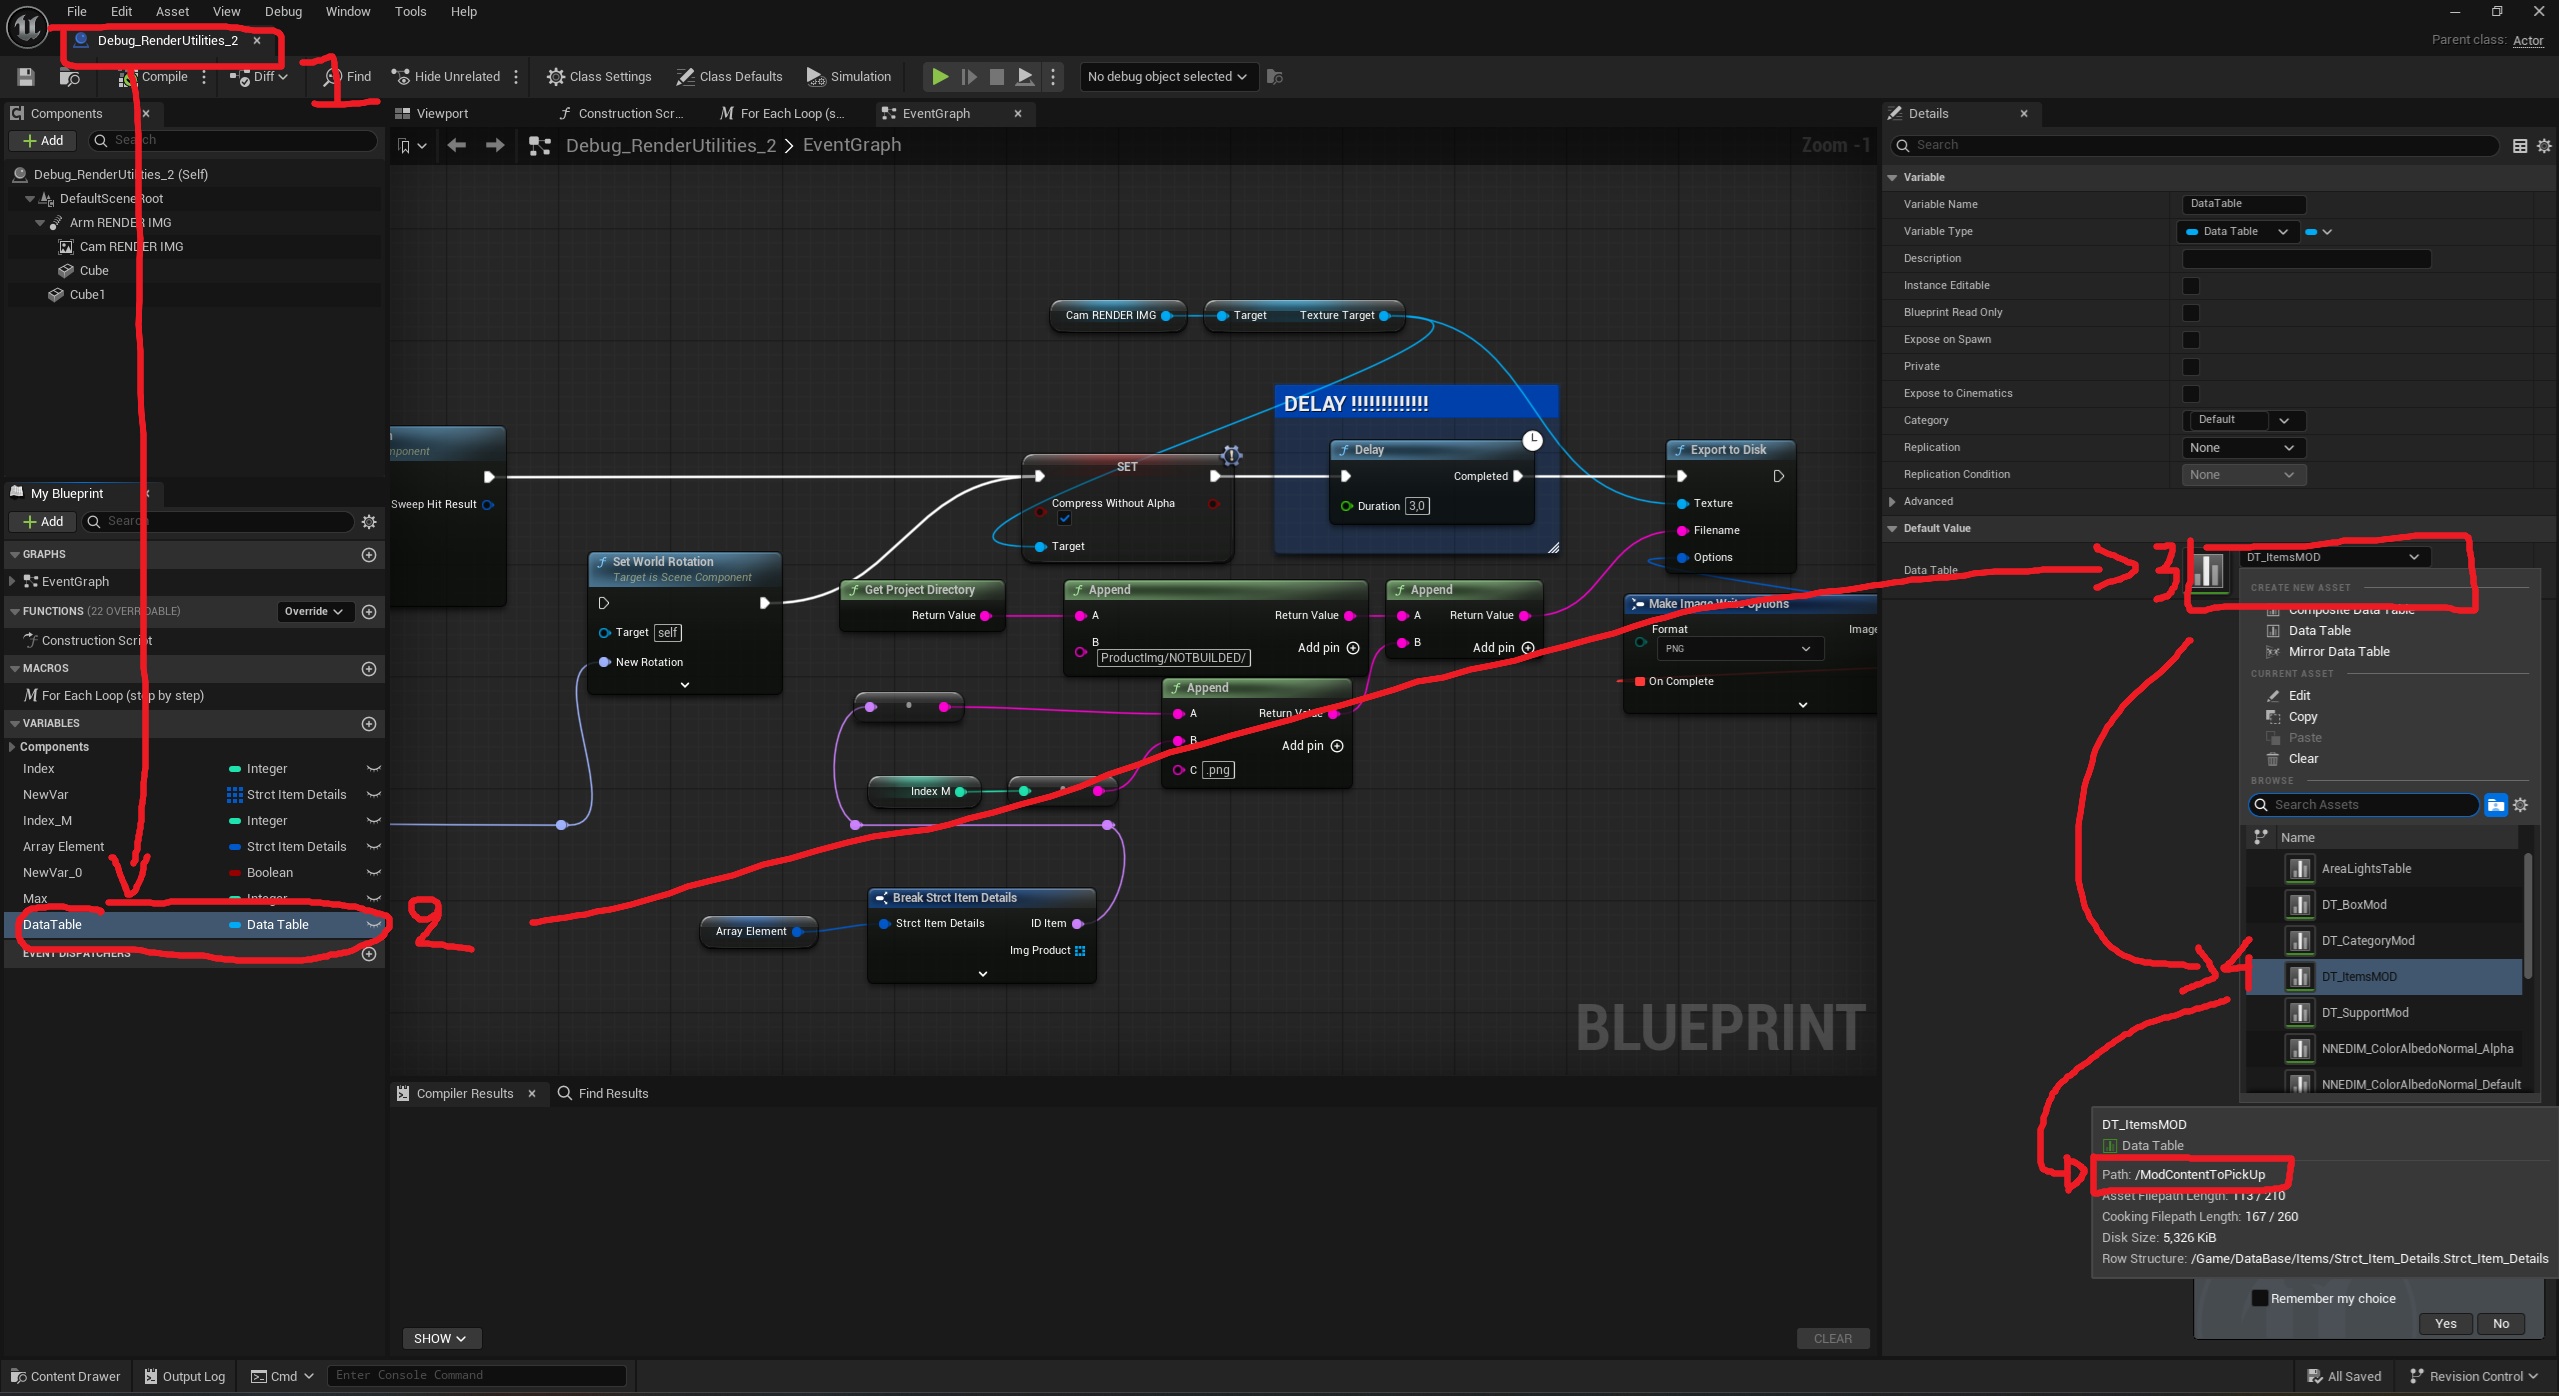
Next, also change the data table variable for this “Wb_ConvertImage” blueprint to “DT_ItemsMOD”.
After that, we can launch the “Map_StartRendering” map, then click the green “Start” button.
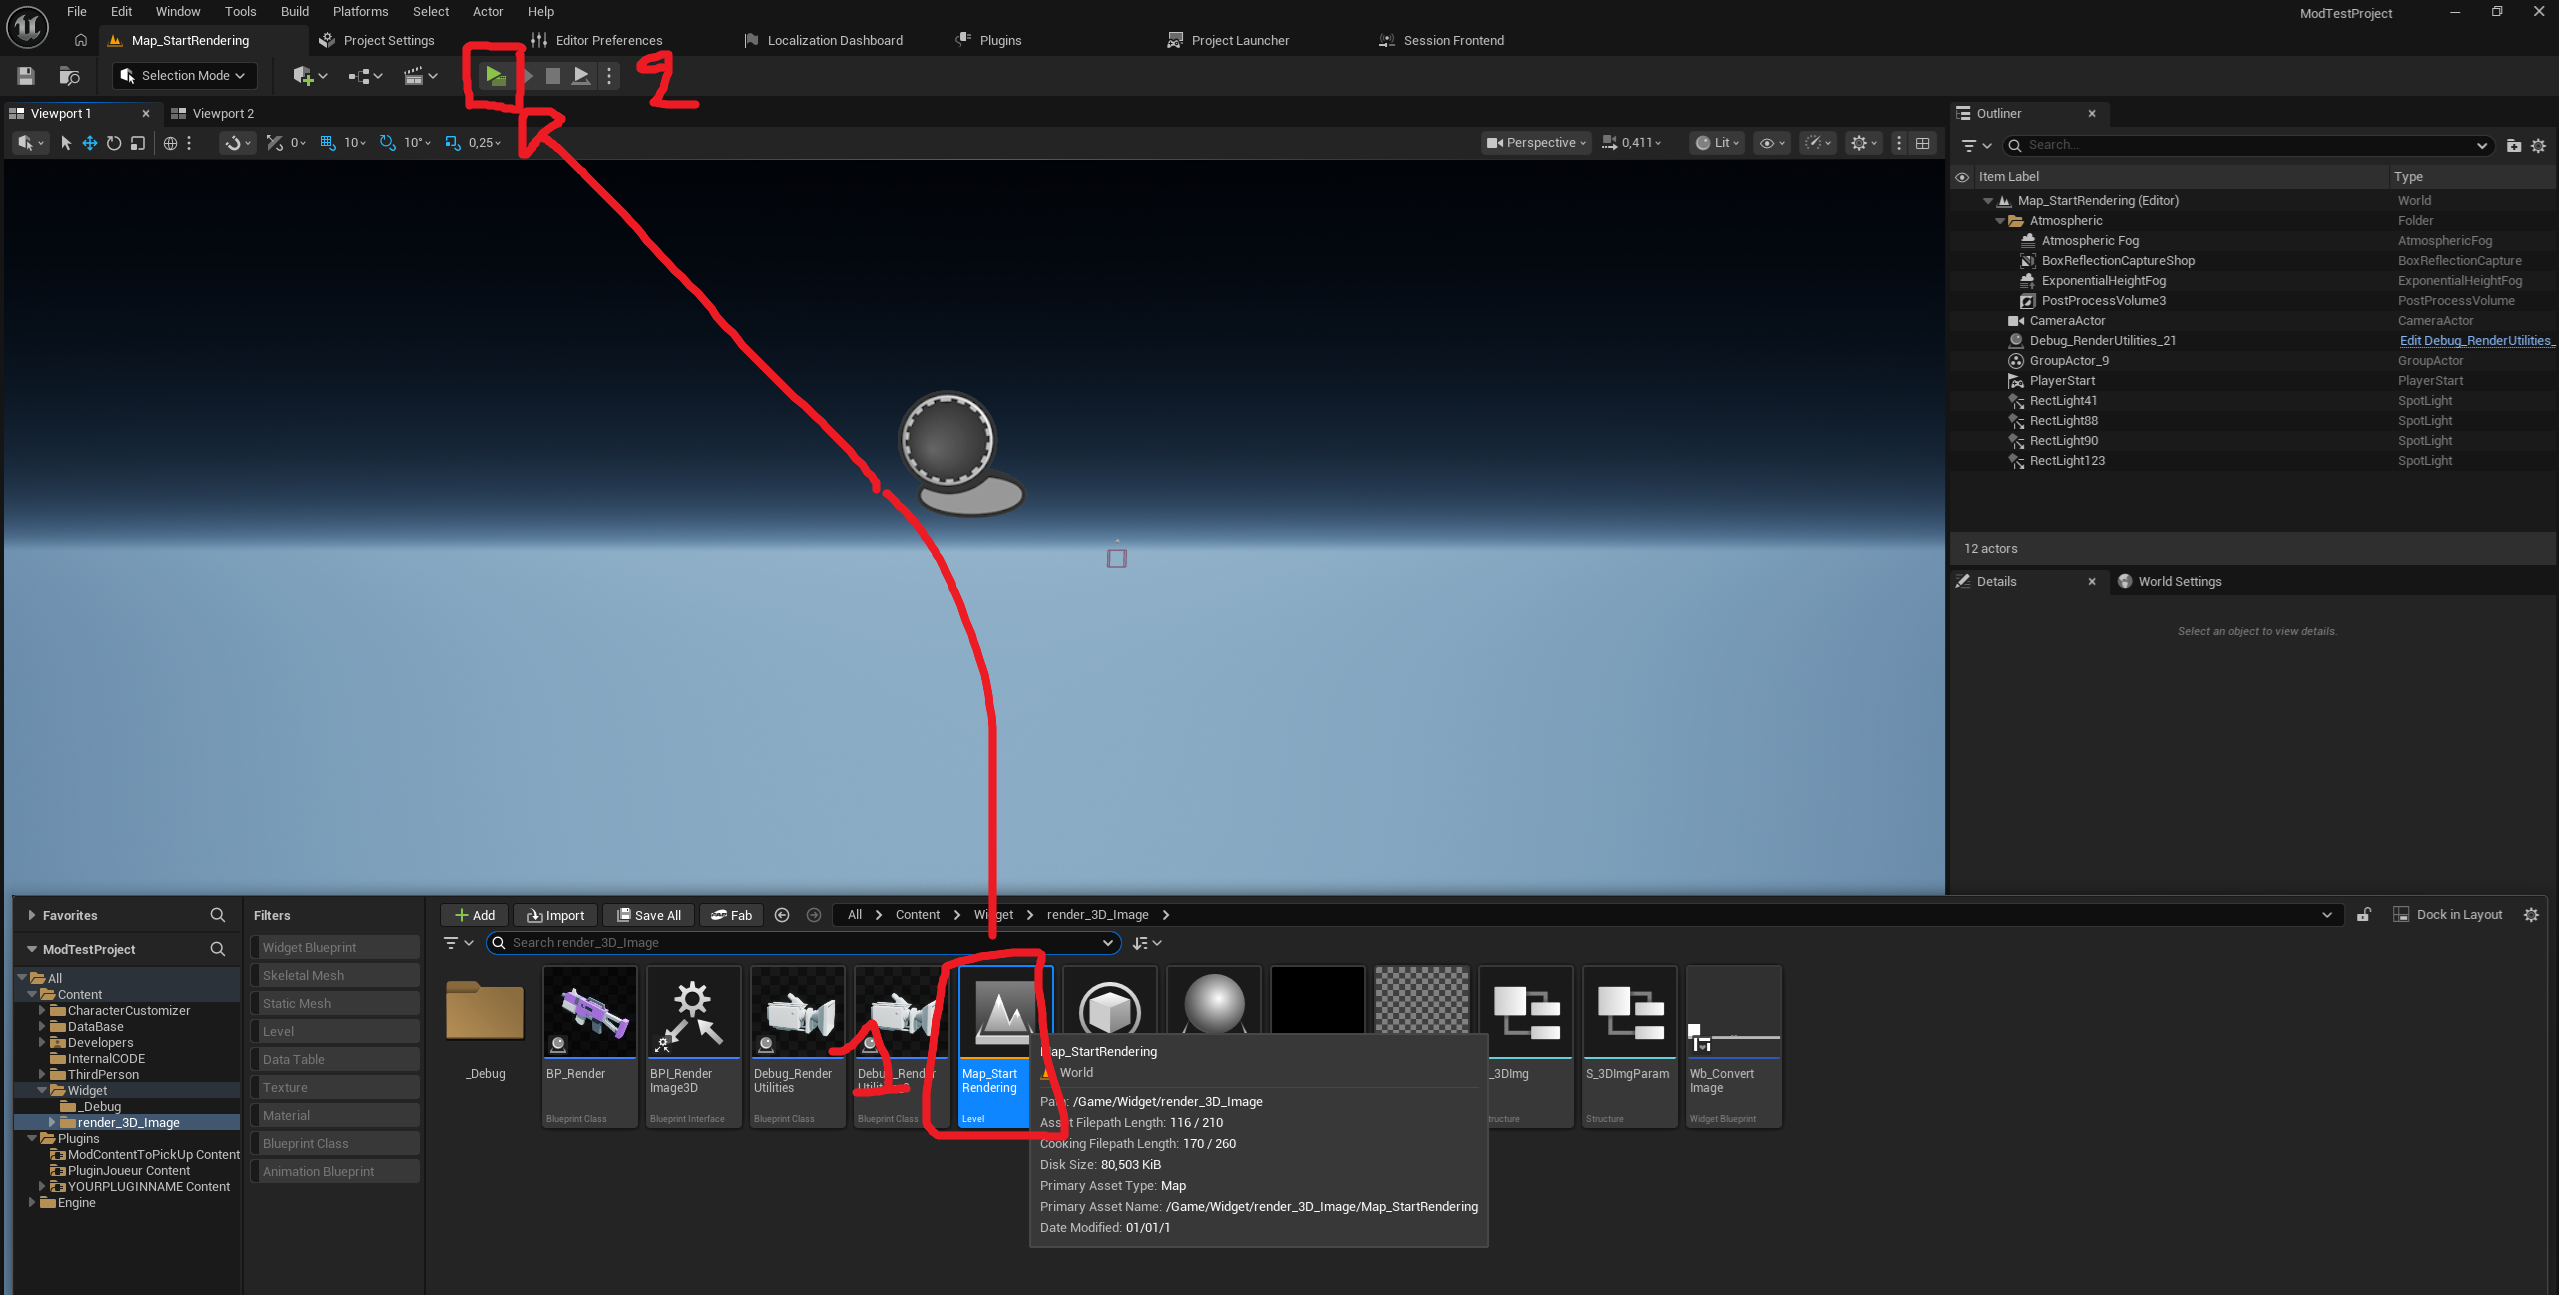
Next, a window will open, and at the bottom of that window, there will be a large white button labeled “Start Render.” Click on it and wait a few seconds
(each image takes 3–5 seconds to generate; the next image will be generated every 3 seconds).
Once all the images are finished, you can close the project, open Windows File Explorer, navigate to your project folder, and then go to YOURPROJECTFOLDER>ModTestProject>ProductImg>NOTBUILDED
Normally, you should find transparent images of your items with a black background.
If that's the case, congratulations!! You can move on to the next step.
Go back to the root of your project folder, and you should see a file named “ConvertImg.py.” Right-click it and open it with Notepad.
There are two variables at the bottom of the file: one called "src_folder" and another called "dst_folder". Only the beginning of the path needs to be changed to match the installation location of your “ModTestProject” project. Once you're done, save your changes.
DONT PUT "\" FOR THE PATH, USE ONLY THIS ONE "/"
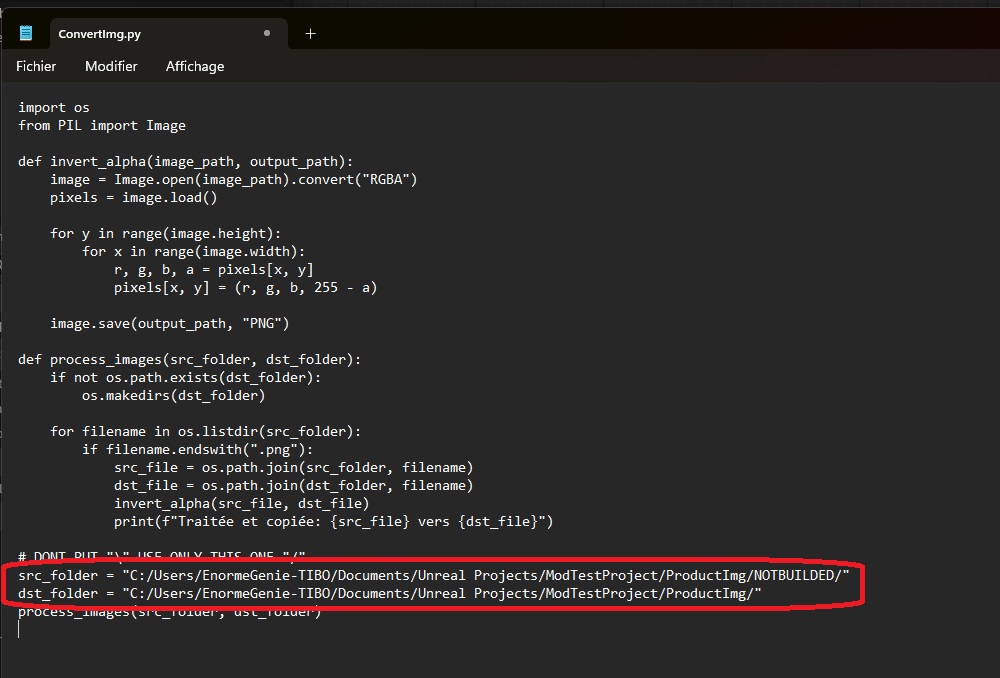
Now, we'll need Python. Please install it from the official website: https://www.python.org/downloads/
I'm using version 3.14, but the other versions should work as well.
Once you've downloaded Python, open it and you'll see an installation window. Click “Install,” then
when asked “Add command directory to your PATH,” type “y” and press Enter.
Then, when asked “Install the current latest version of CPython,” type “y” and press Enter.
Next, open the Windows Command Prompt and type this command:
pip install Pillow
Once the installation is complete, run “ConvertImg.py” using Python. The final image of your product should then be in the "ImgProduct" folder.
Next, to import the image into UE5 in the best possible format, you can go to the “Import files into Unreal Engine” section of the documentation.