In this tutorial, we'll learn how to import all types of files into Unreal. There are a few nuances to consider for certain file types, so we'll first learn how to import all types of files, and then we'll cover those nuances.
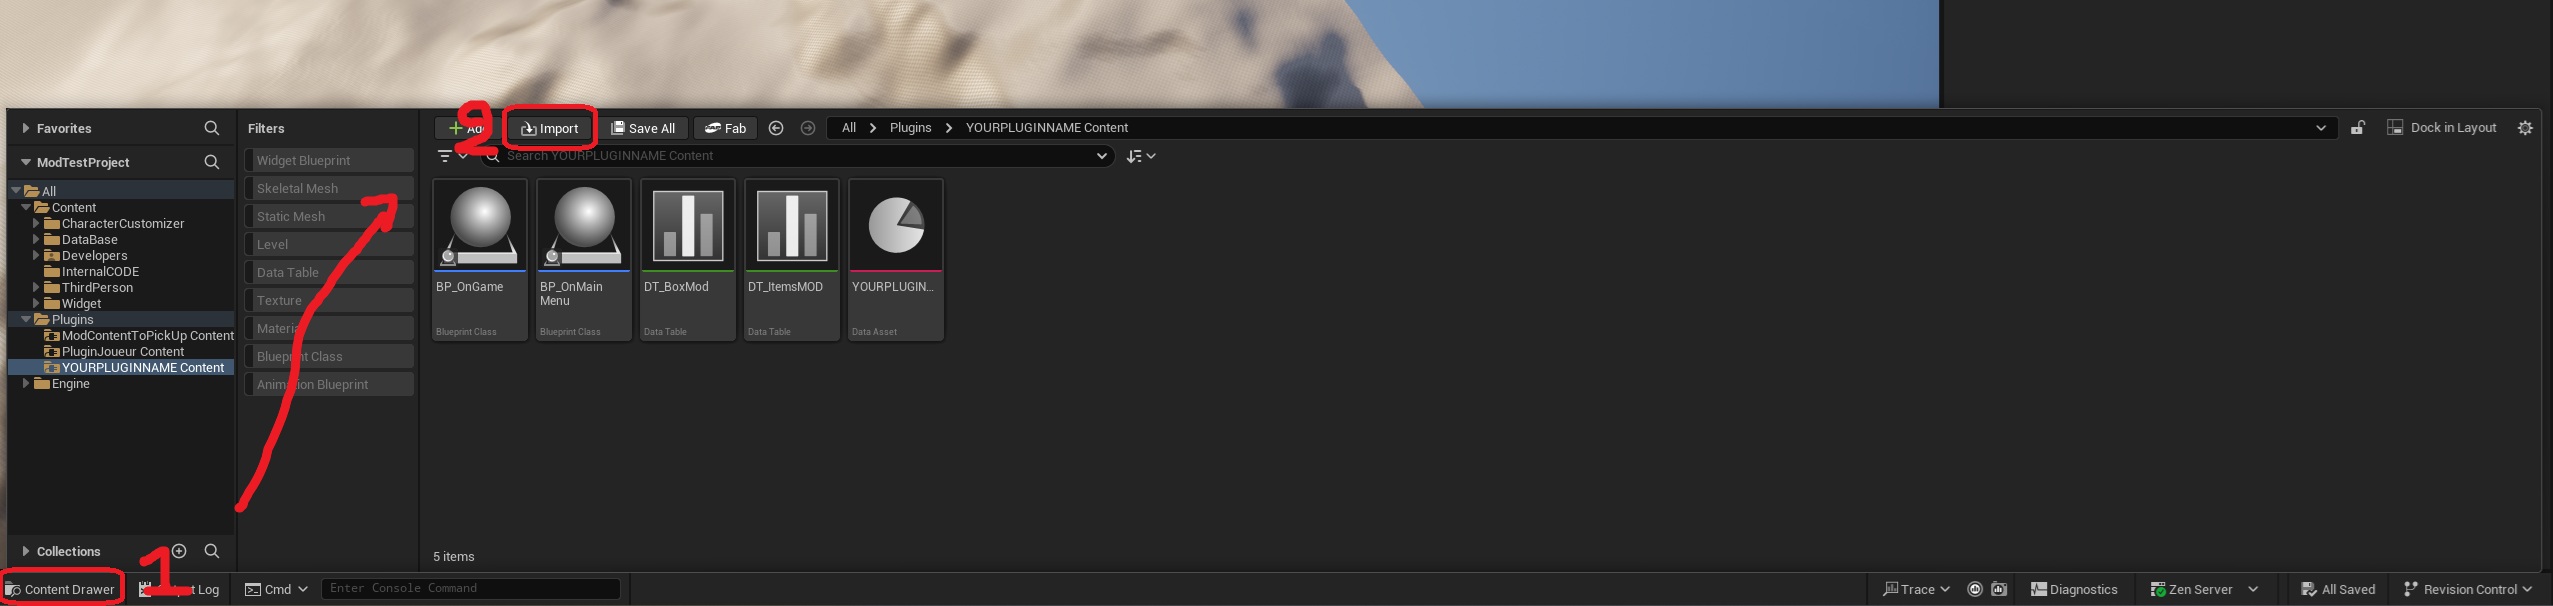
To import a file into Unreal Engine, simply open the Content Drawer in the lower-left corner, then click the “Import” button located in the upper-left corner of the Content Drawer.
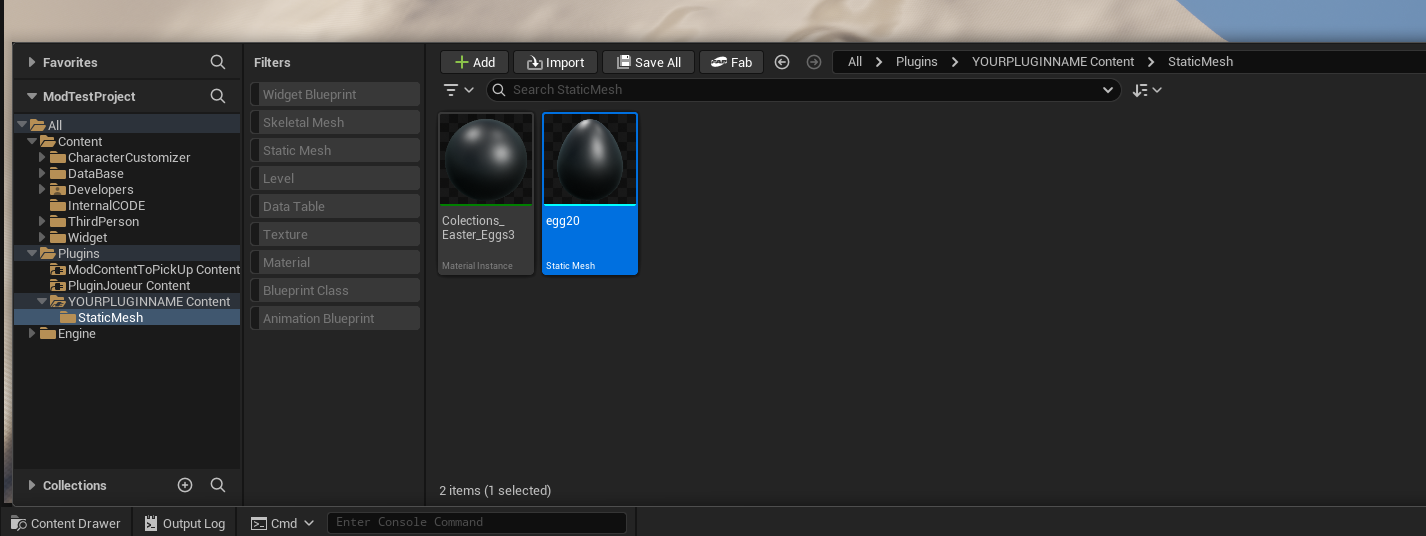
And there you go! Your file will be imported, and you can use it however you like. Now that the file has been imported, there are a few adjustments to make for certain files. Here are the ones that need adjustments:
Once you've imported a 3D model, there's a good chance it will turn black or won't be optimized. Let's take a look together. First, I imported an egg: here's what I saw in Unreal:
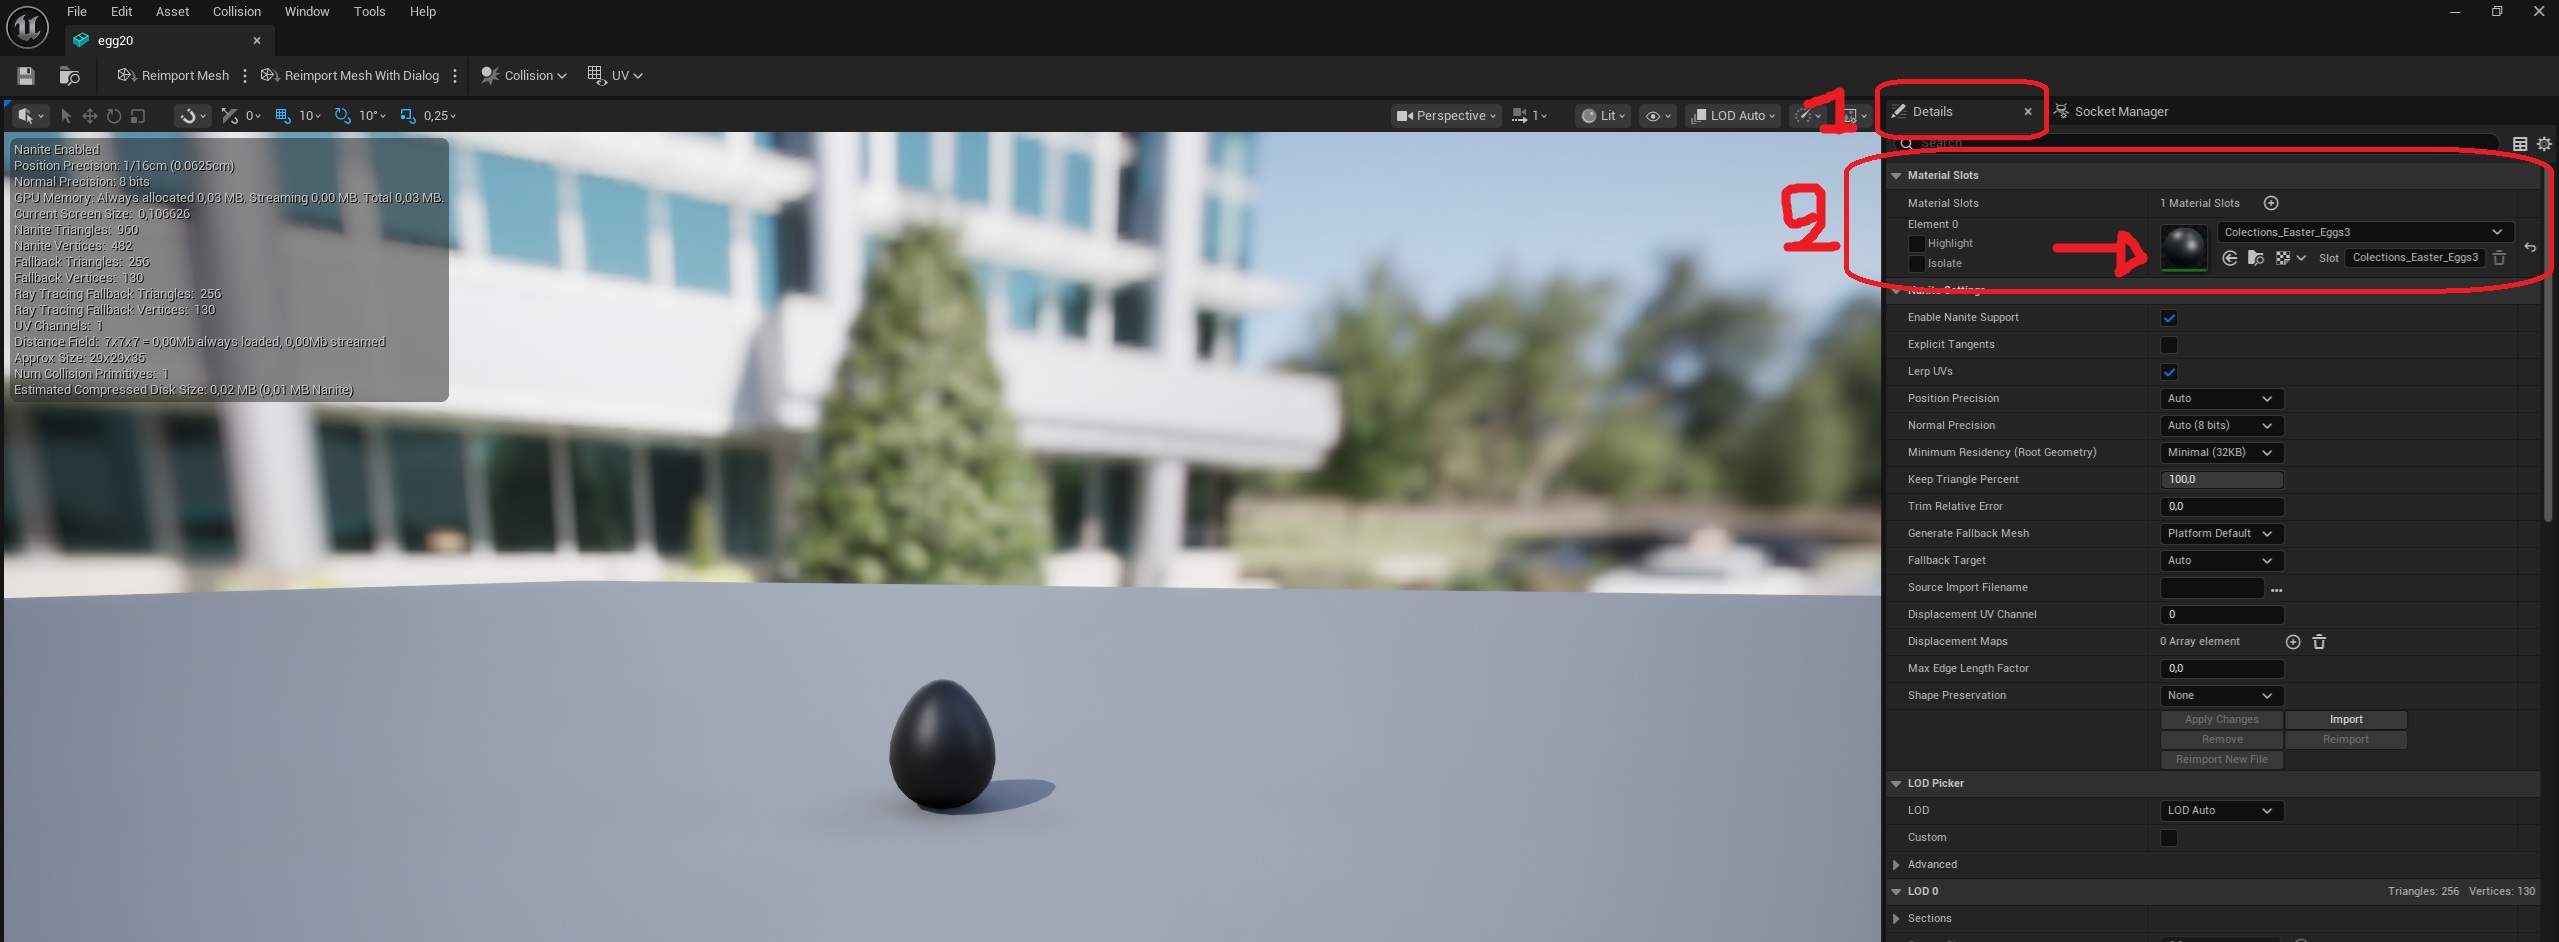
If you're lucky, you'll also see images that have been imported. These are your textures. I don't have any here, but in any case, a static mesh must be linked to a “Material.” To check if it’s properly linked and see which one it’s link to, open the static mesh and look in the Details tab (reminder: if a tab isn’t displayed, you can show it in the “Windows” section at the top left), So, in the Details tab, there’s a “Material Slot.” It can be linked to multiple materials. that doesn’t matter. First, let’s see how to restore its color: Let's start by adding our own material instance:
go to the content drawer in the lower-left corner, right-click in the empty space, and then search and click “Material instance”.
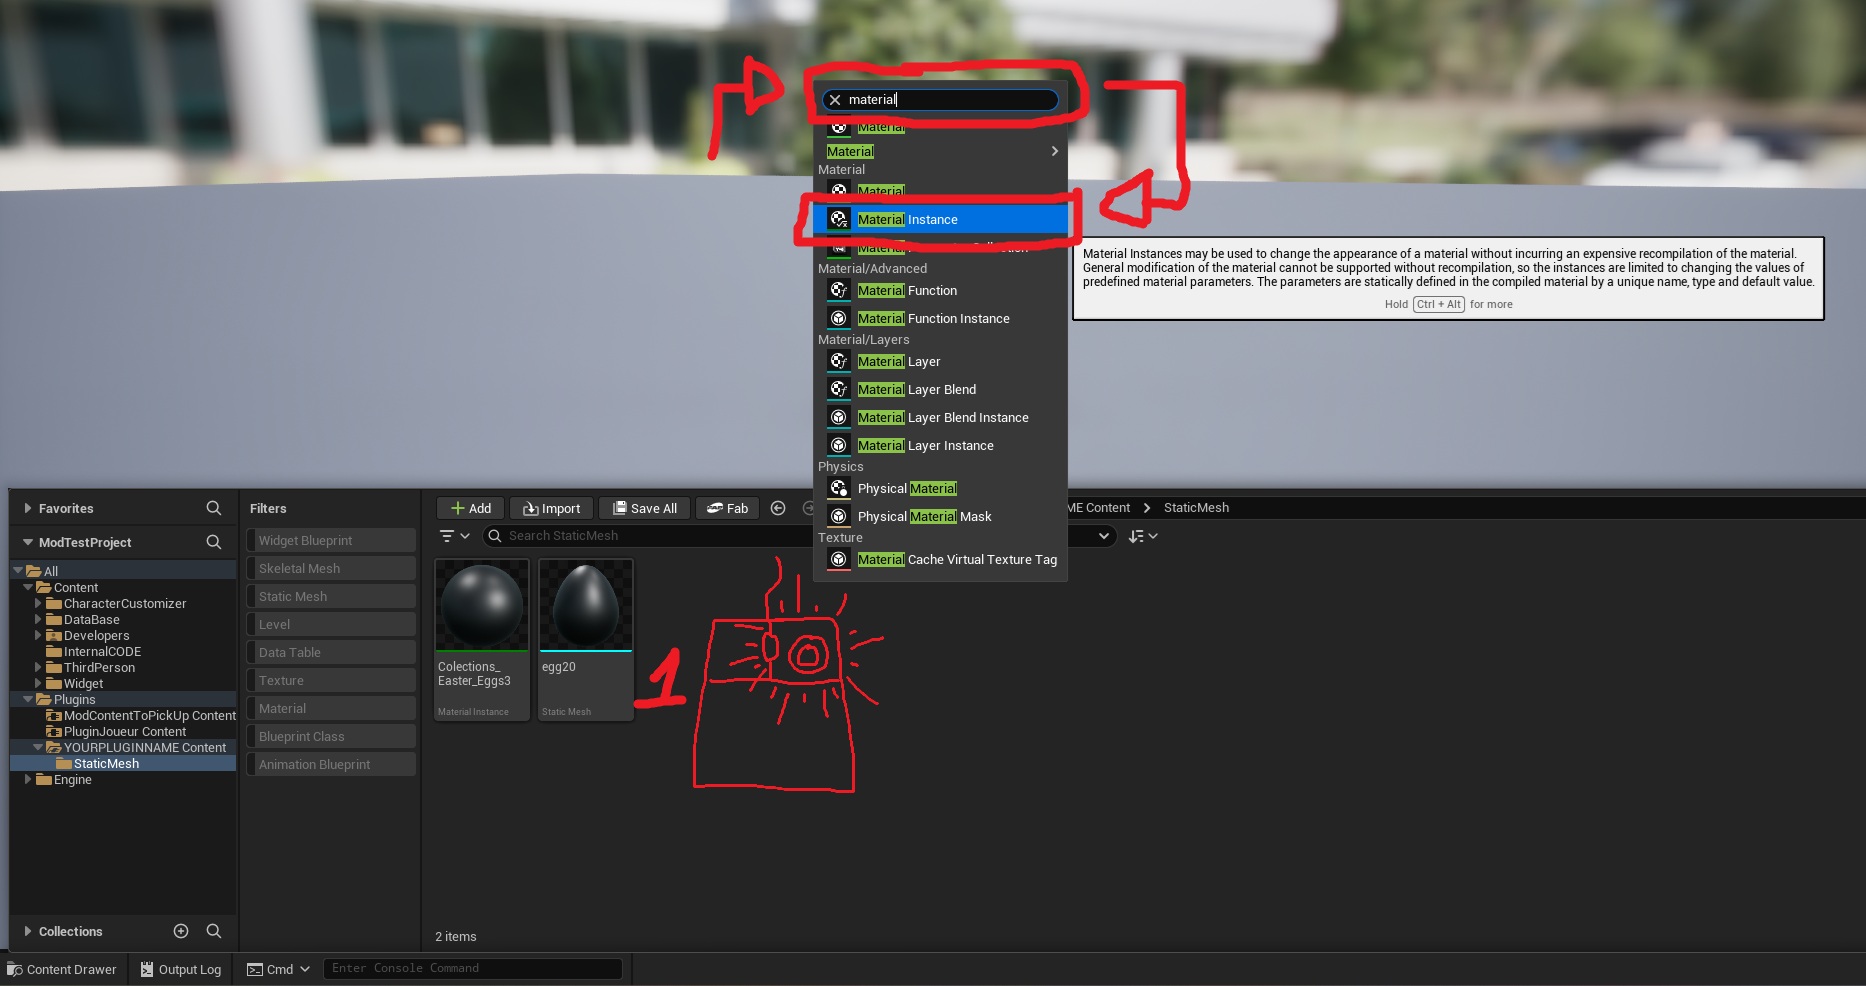
And then open it! (you can tell it’s a material instance because when you open a material, there’s Blueprint code, but here there’s just a giant preview of a sphere, which corresponds to a material instance; a material instance is a material that depends on another).
Then change the parent to “M_material”
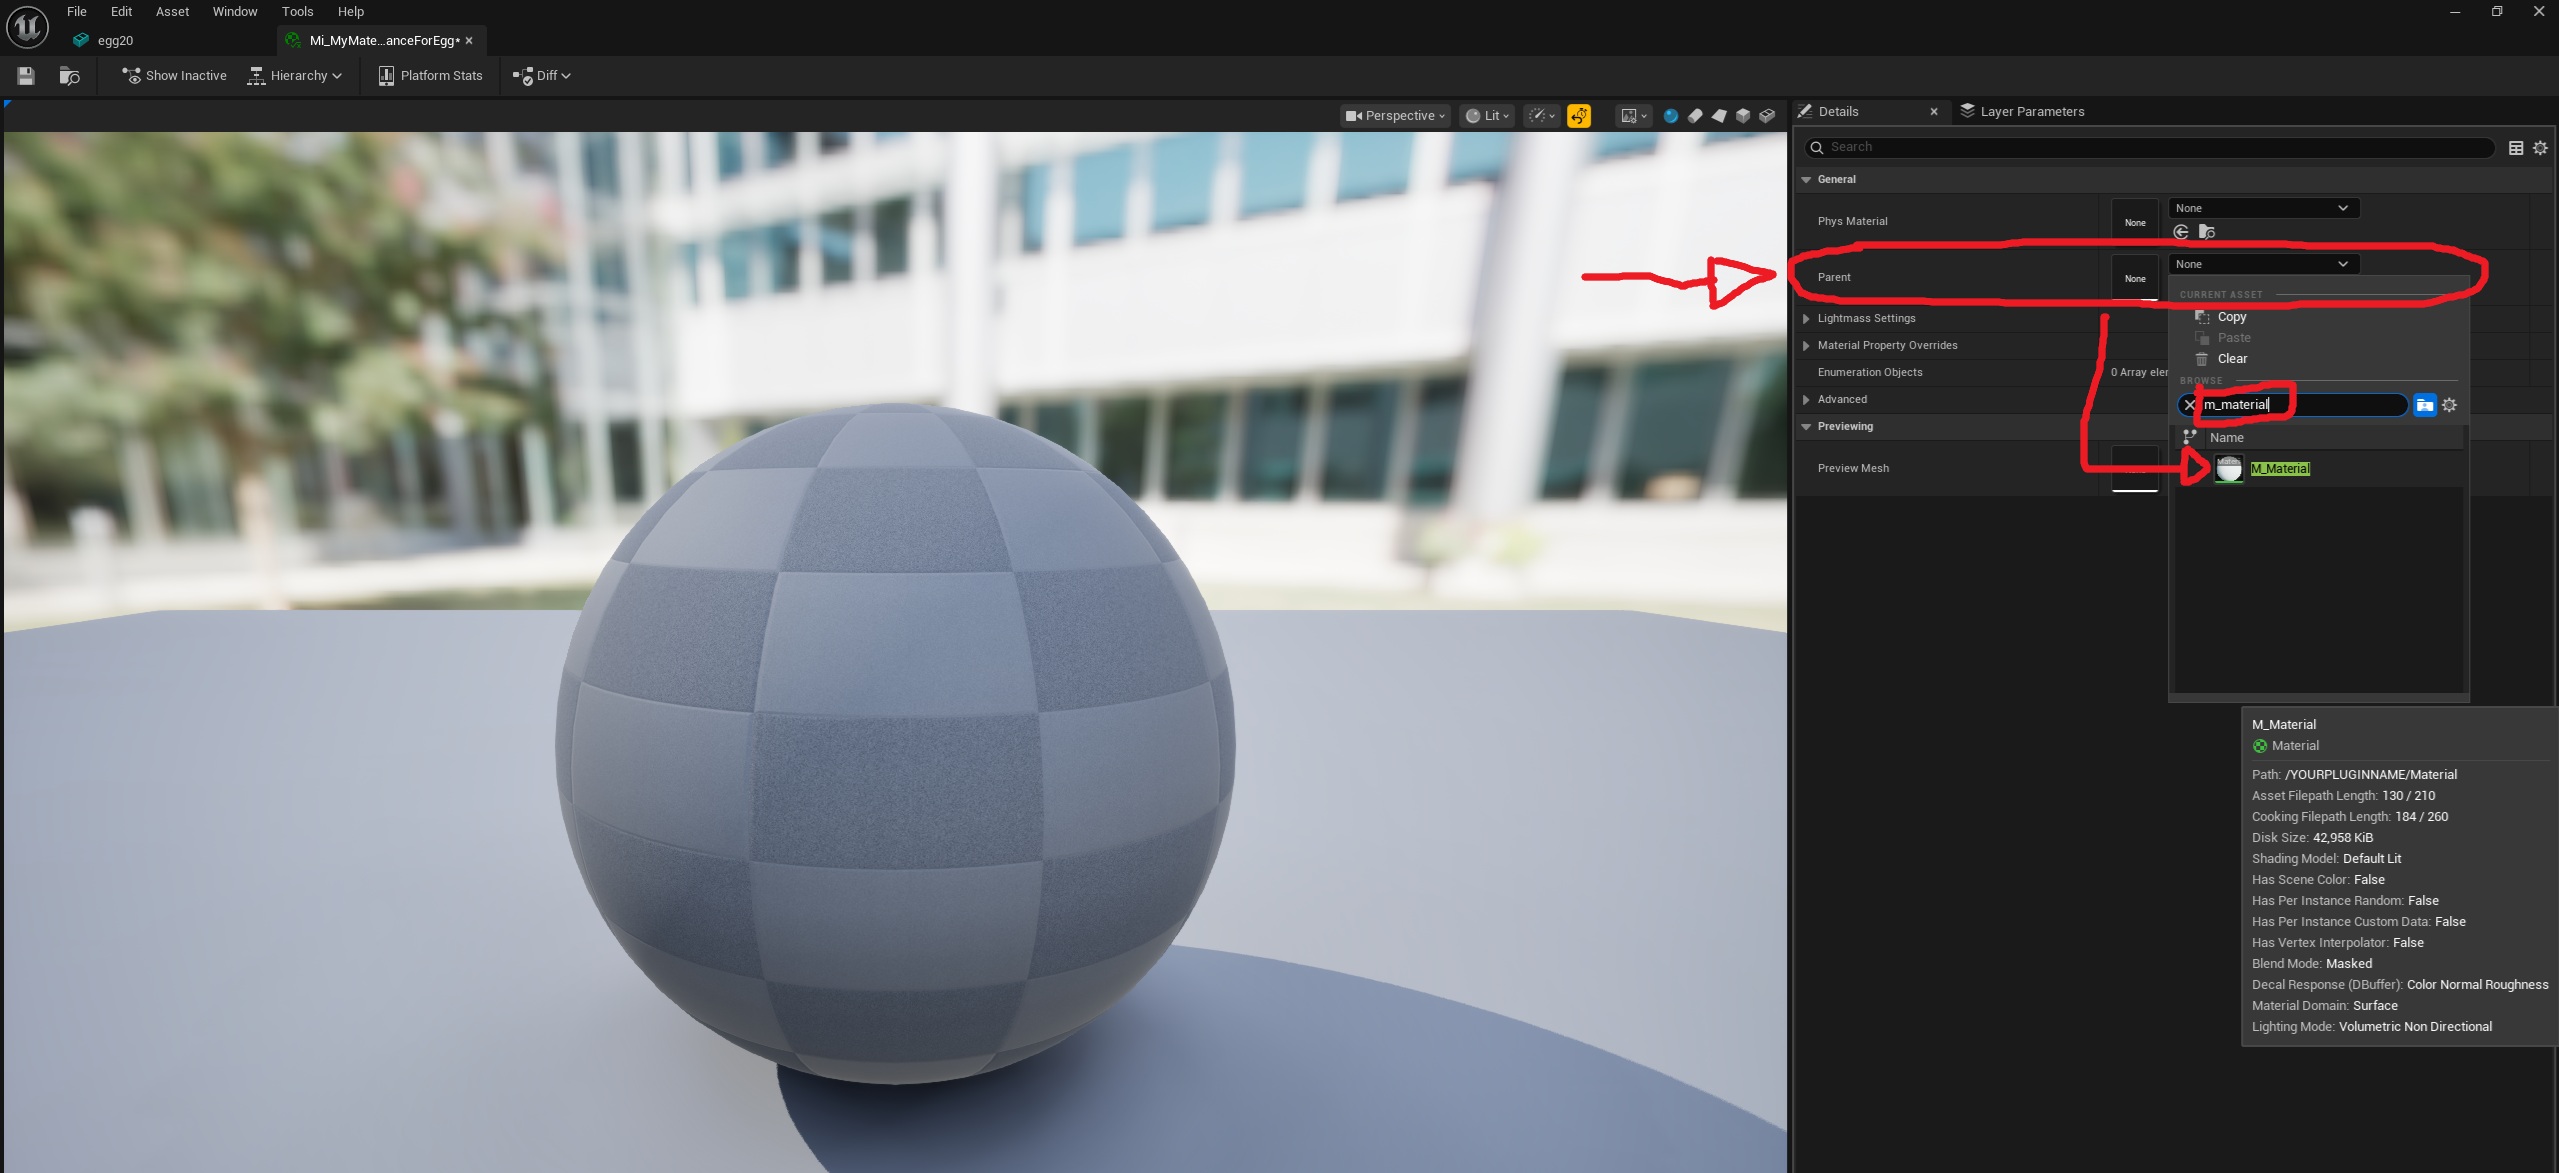
Finally, you can change a few settings, including the most important one: "Albedo" (check the box to edit a setting, and then assign your material's texture to the Albedo).
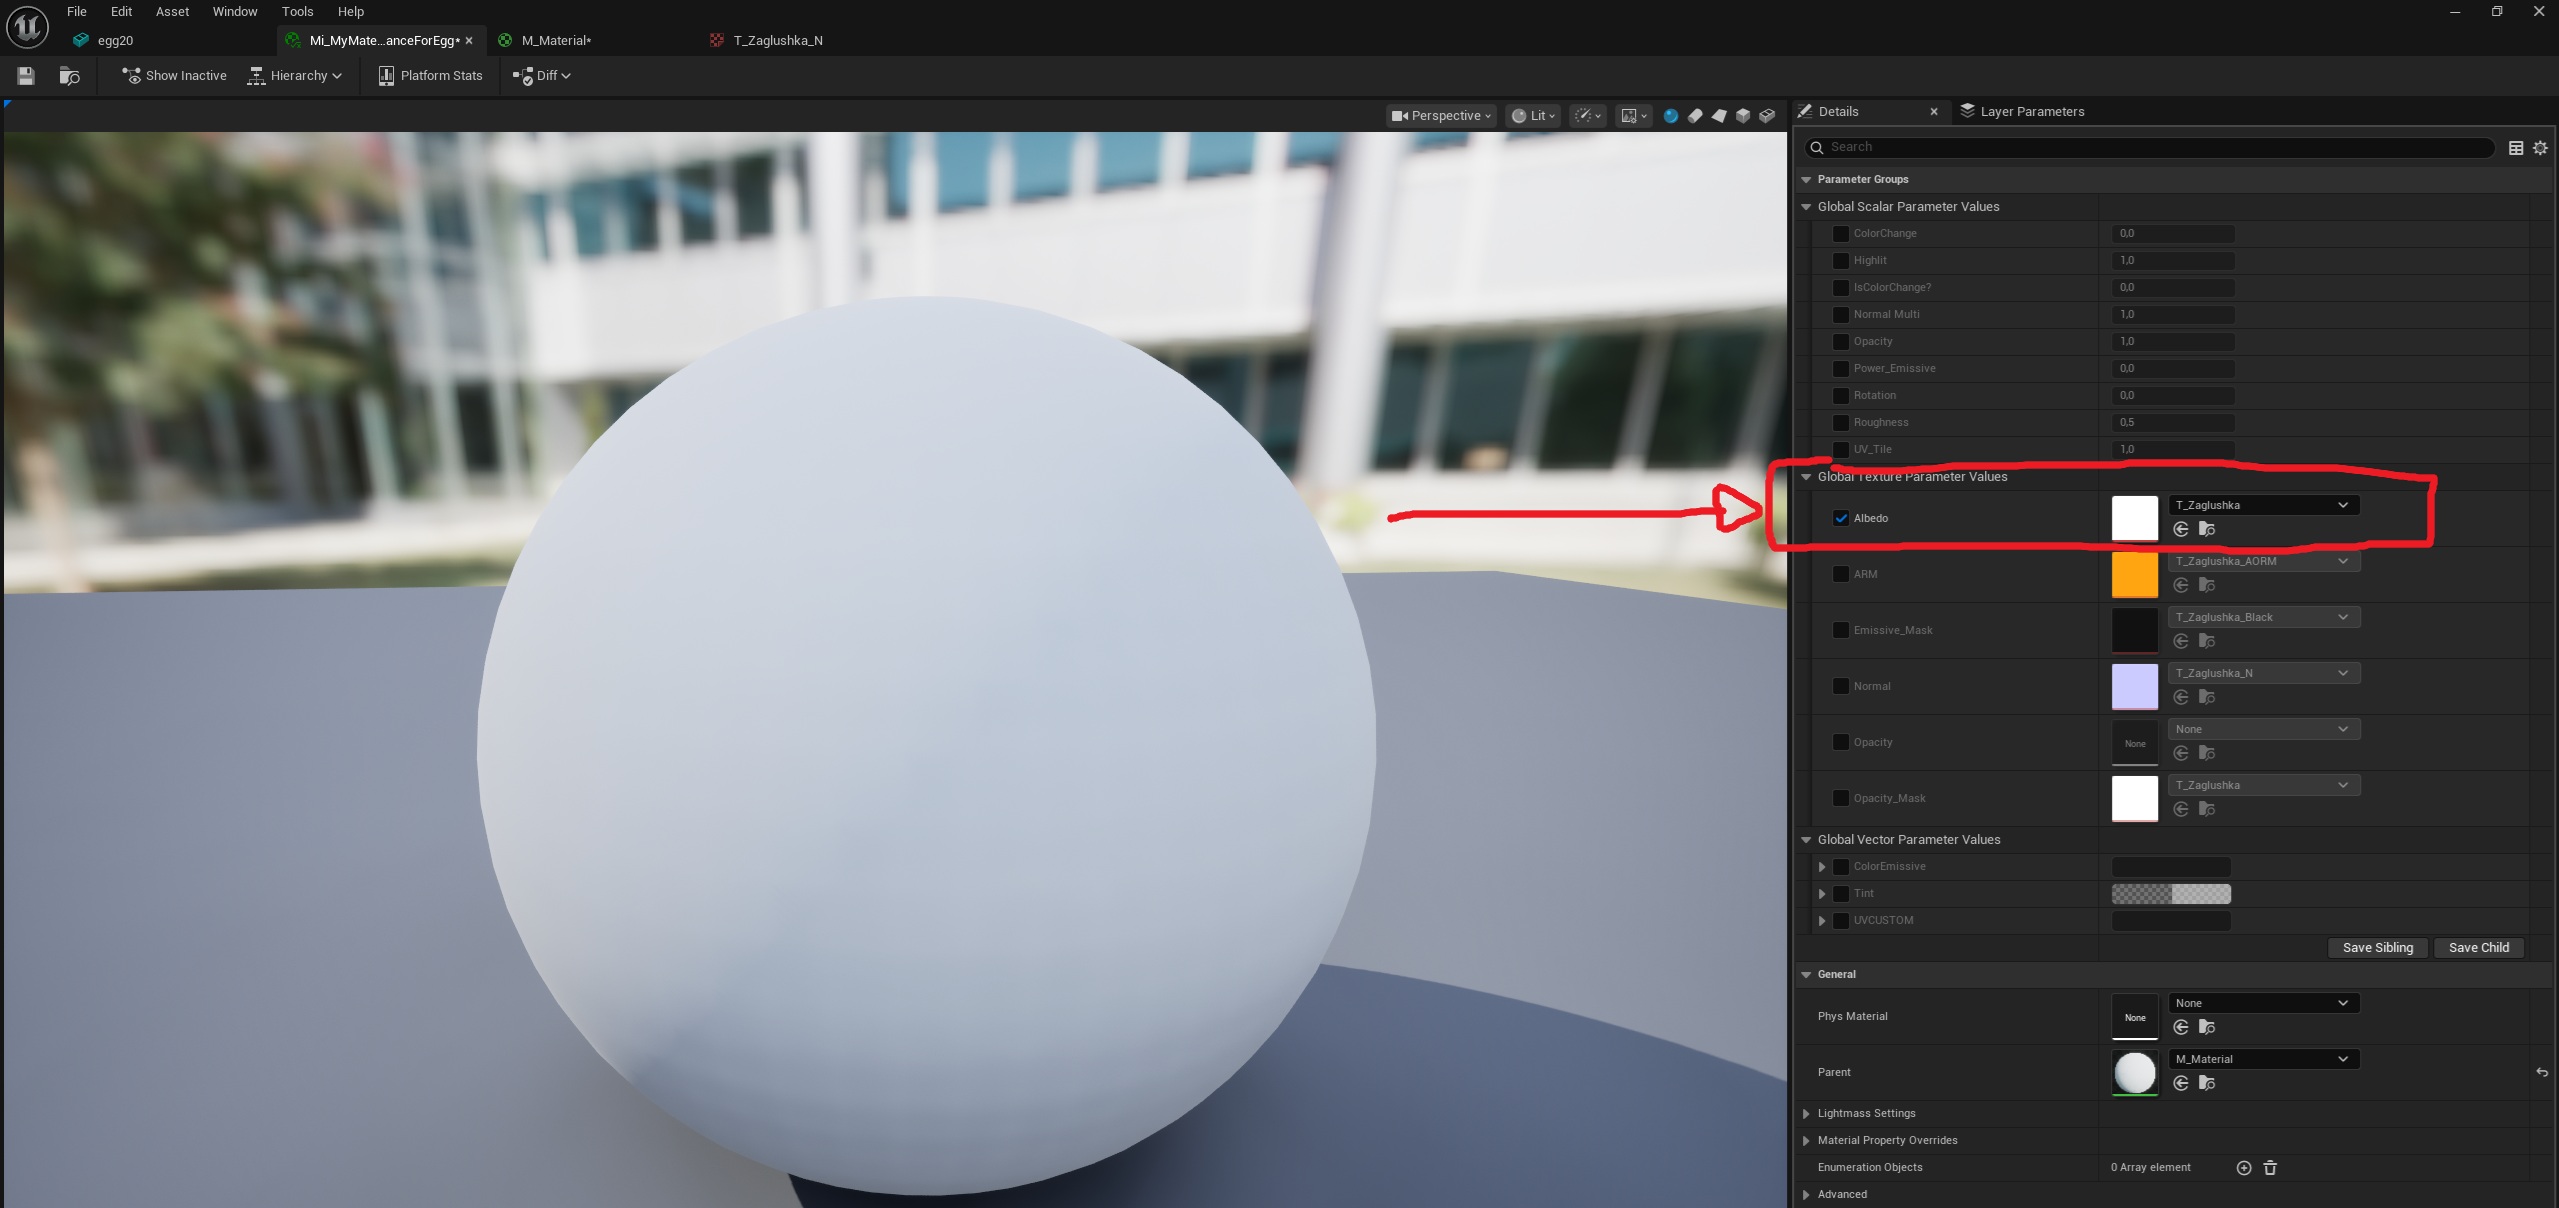
Here are the other useful M Material parameters (OPTIONAL) that allow your material to be shiny, change color, or more:
Now go back to your static mesh and change the assigned material, the one we looked at earlier: to the one you just created.
First, if the static mesh has Nanite, you need to disable it. So make sure the “Enable Nanite Support” checkbox is unchecked. If it isn't, uncheck it and then click “Apply Changes.”
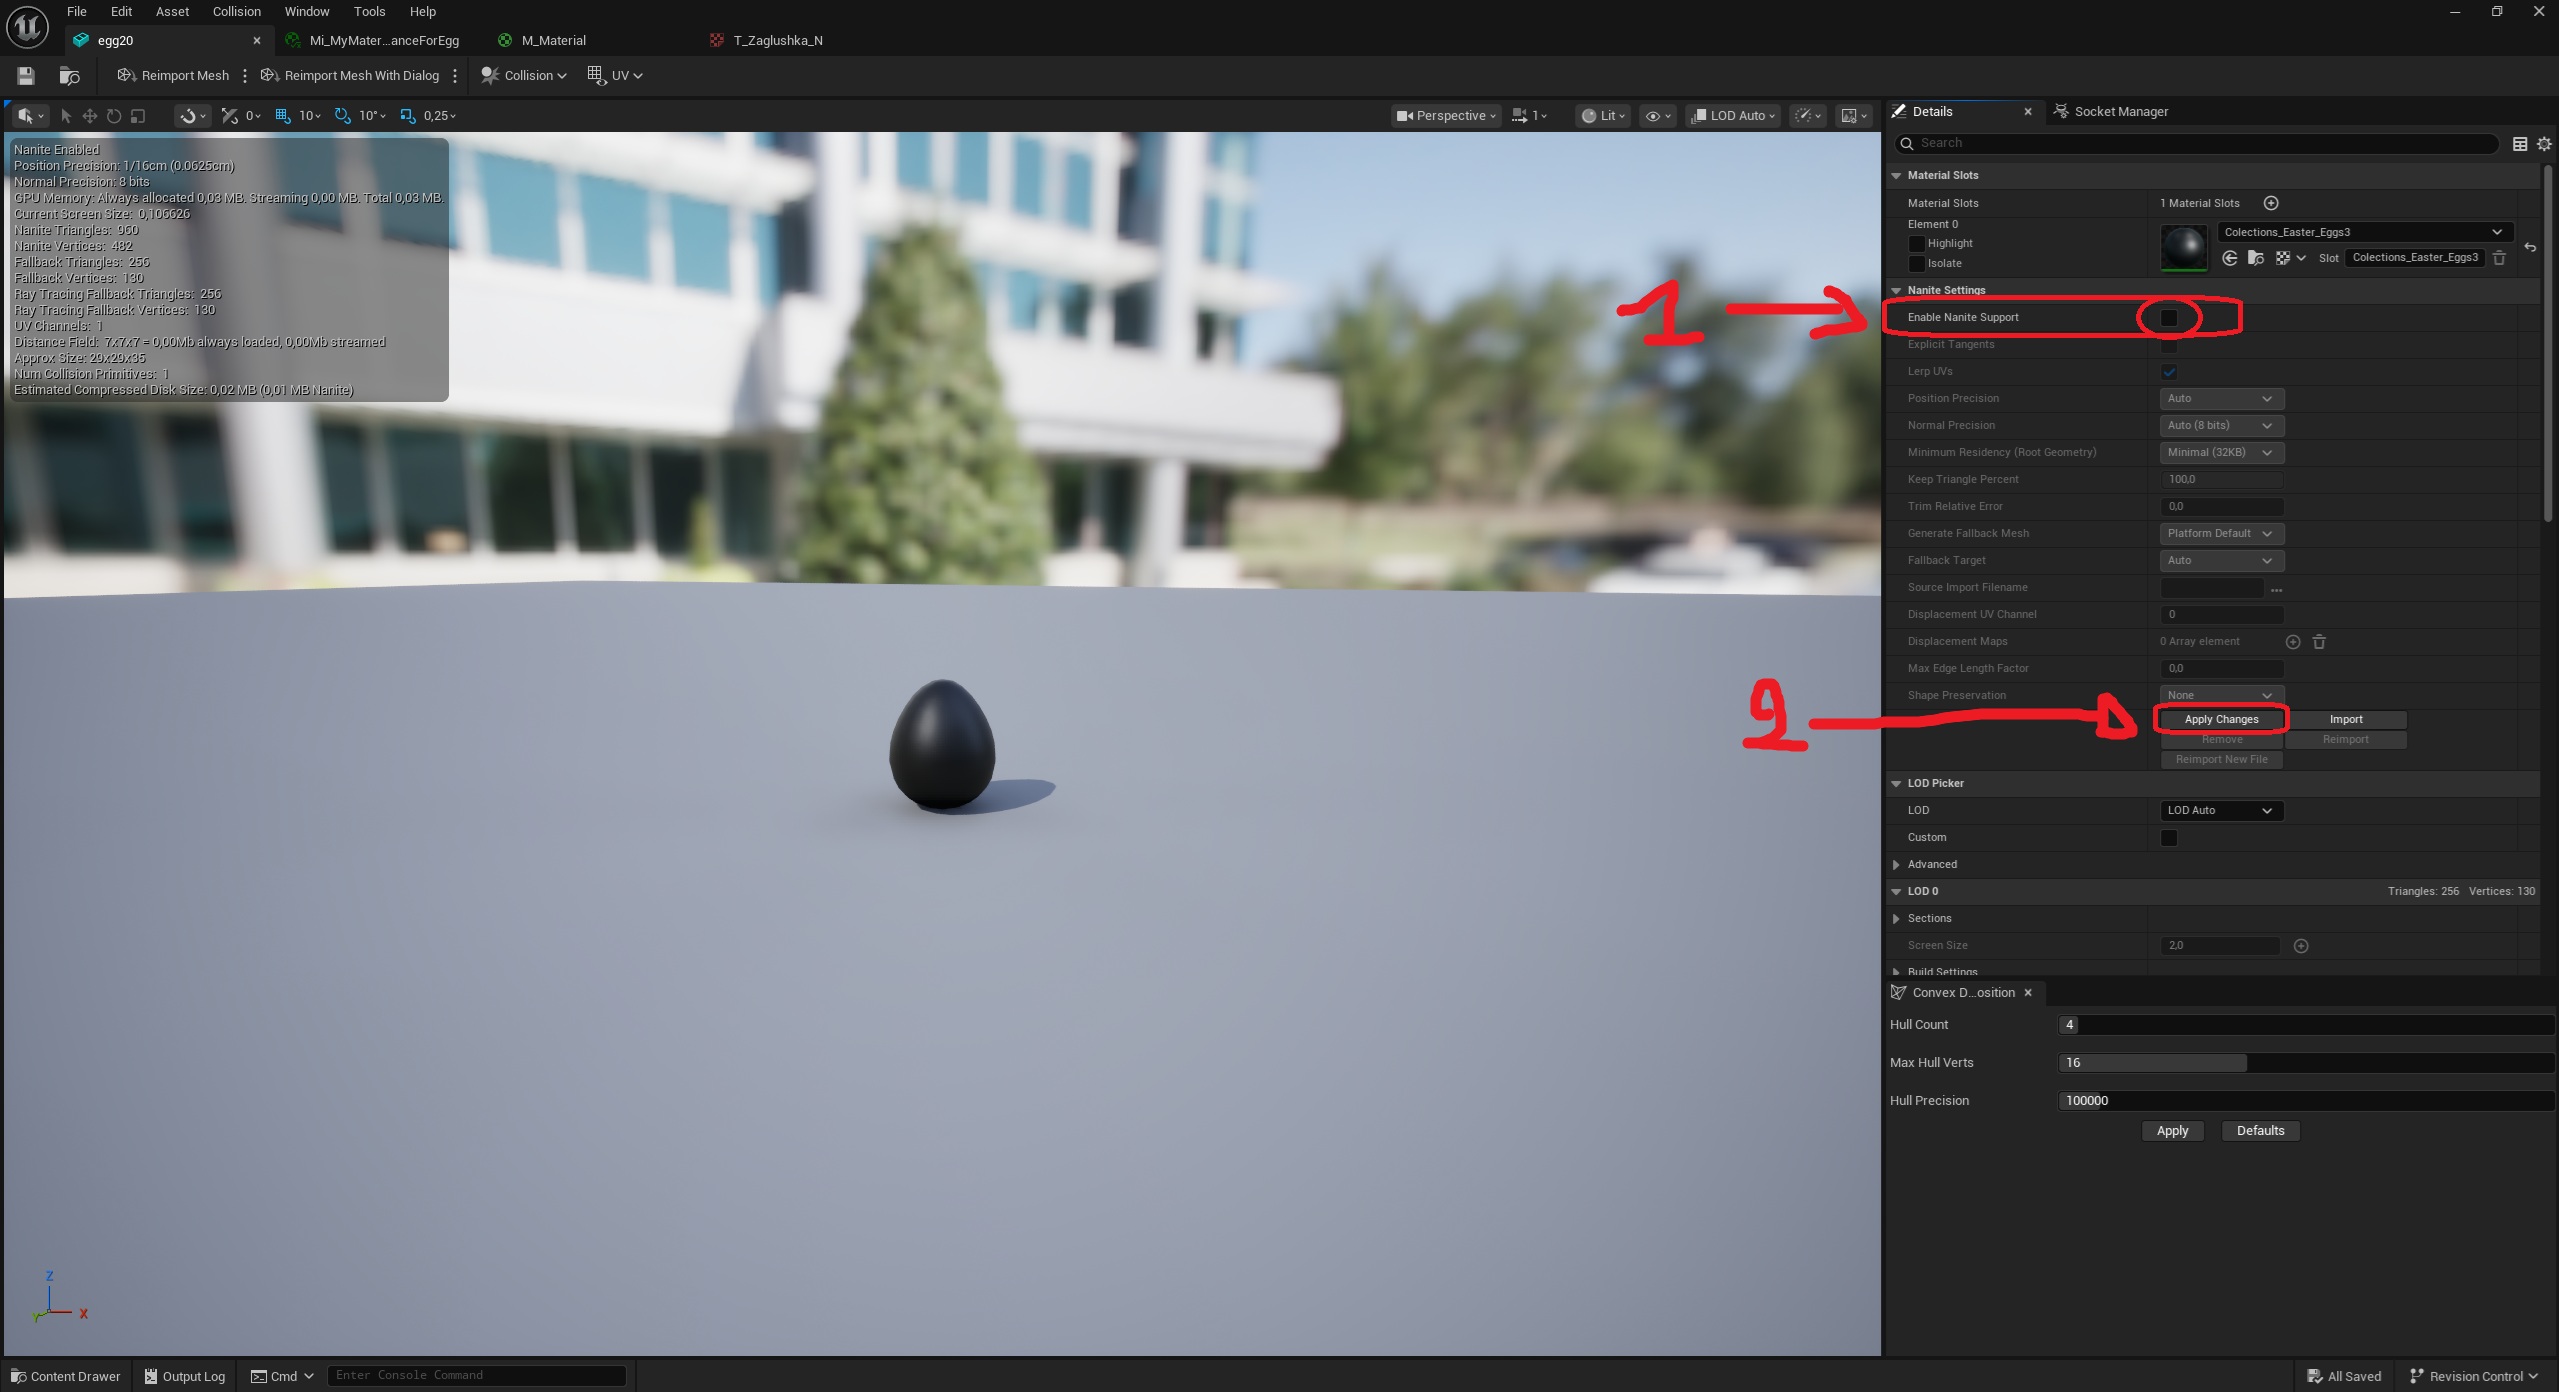
Finally, you can reduce the number of triangles to make the object less detailed, but avoid causing the game to lag. In the top-left corner, you can see the number of triangles in your object. Since there will likely be hundreds of these objects on the shelves, small items should have fewer than 500 triangles.
To reduce the number of triangles, simply go to the LOD 0 section, then to Reduction Settings, lower the “Percent Triangles” value, and finally click Apply Changes.
.jpg)
Here, I've imported several different textures. These are the three main types of textures:
When you open a texture, there are two settings you'll need to change depending on the type of texture: “Texture Group” and “Compression Settings”
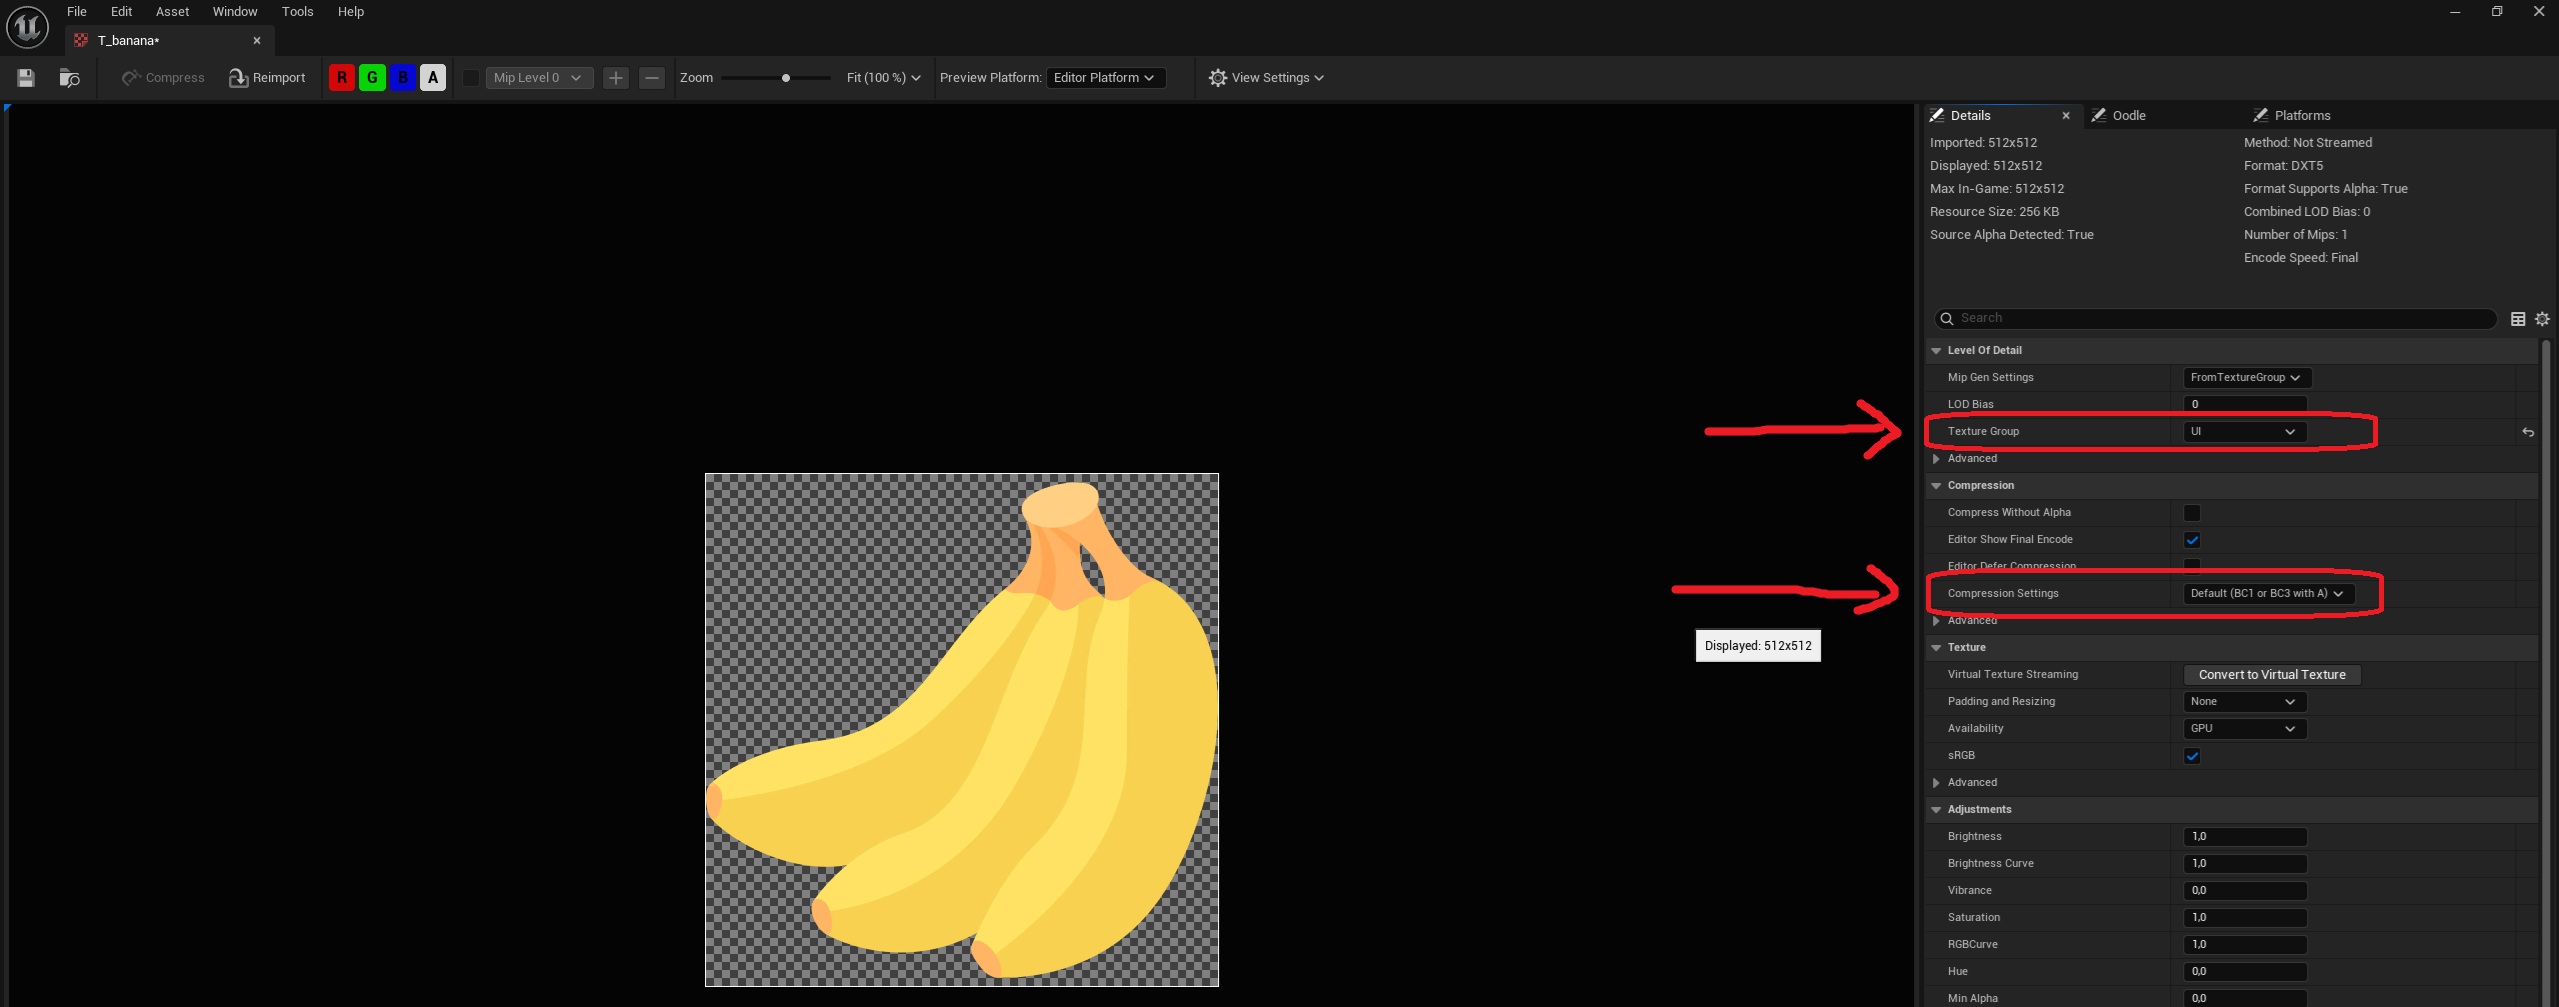
To save on video memory and improve performance, you'll need to lower the texture resolution. We recommend using the following resolutions:
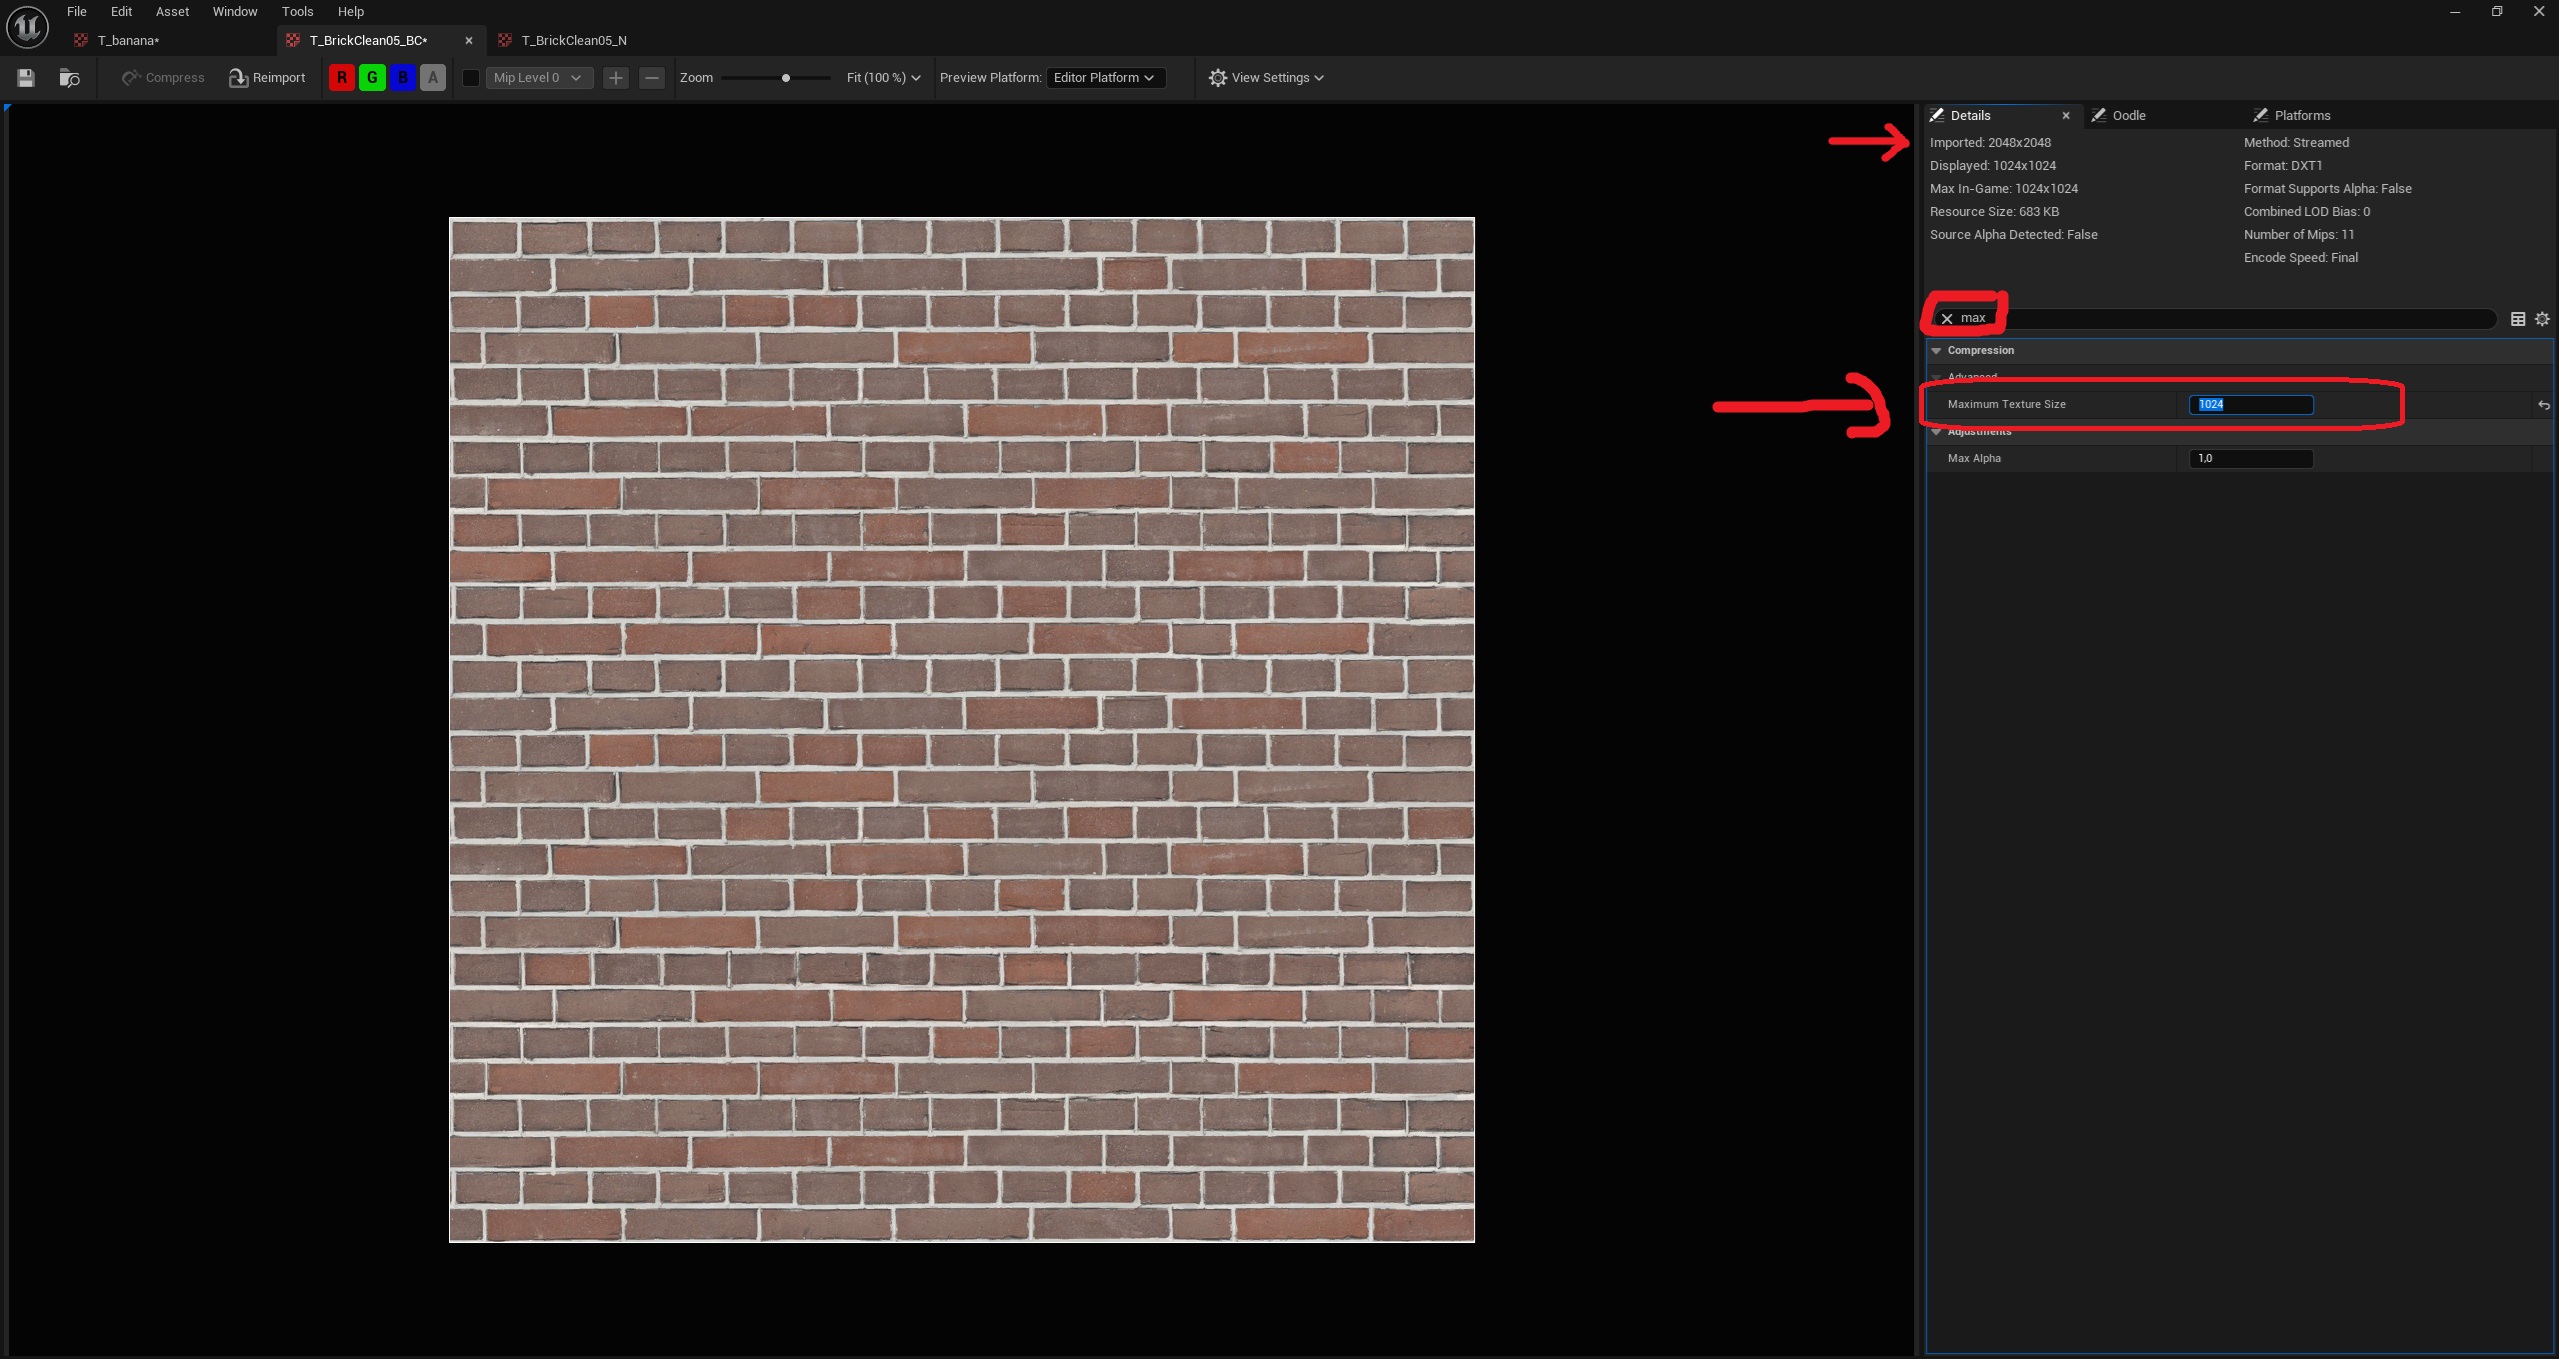
To do this, open a texture, find the “Maximum Texture Size” setting, and enter your resolution (the resolution must be a power of 2).
You can see the base resolution of your texture by looking at the “Imported” parameter
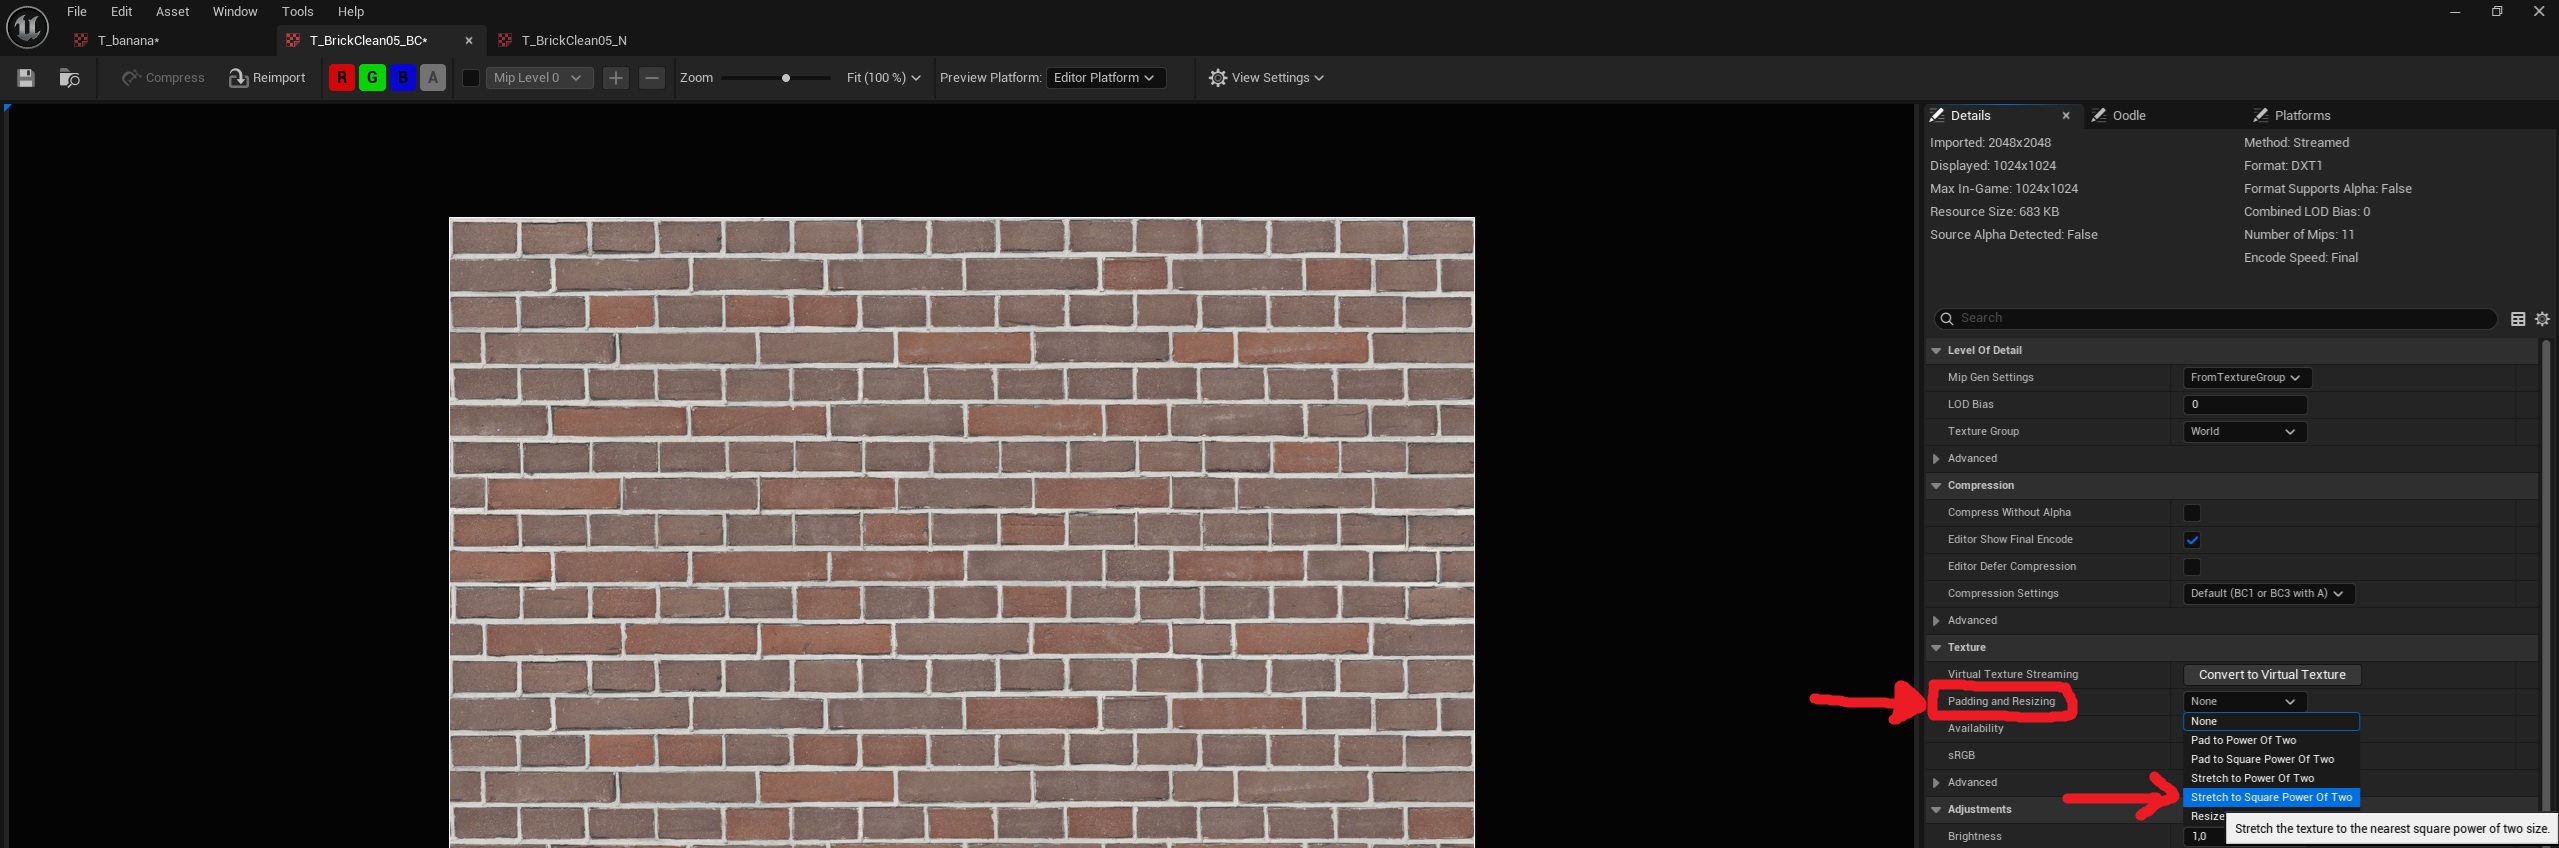
Finally, if the resolution of the imported texture isn't square or isn't a power of two,
you can fix the problem by changing the “Padding and Resizing” setting to “Stretch to Square Power of Two.” The preview might appear stretched, but the texture itself won't change. (Warning: Do not use “Stretch to power of two” on menu textures; it serves no purpose.)
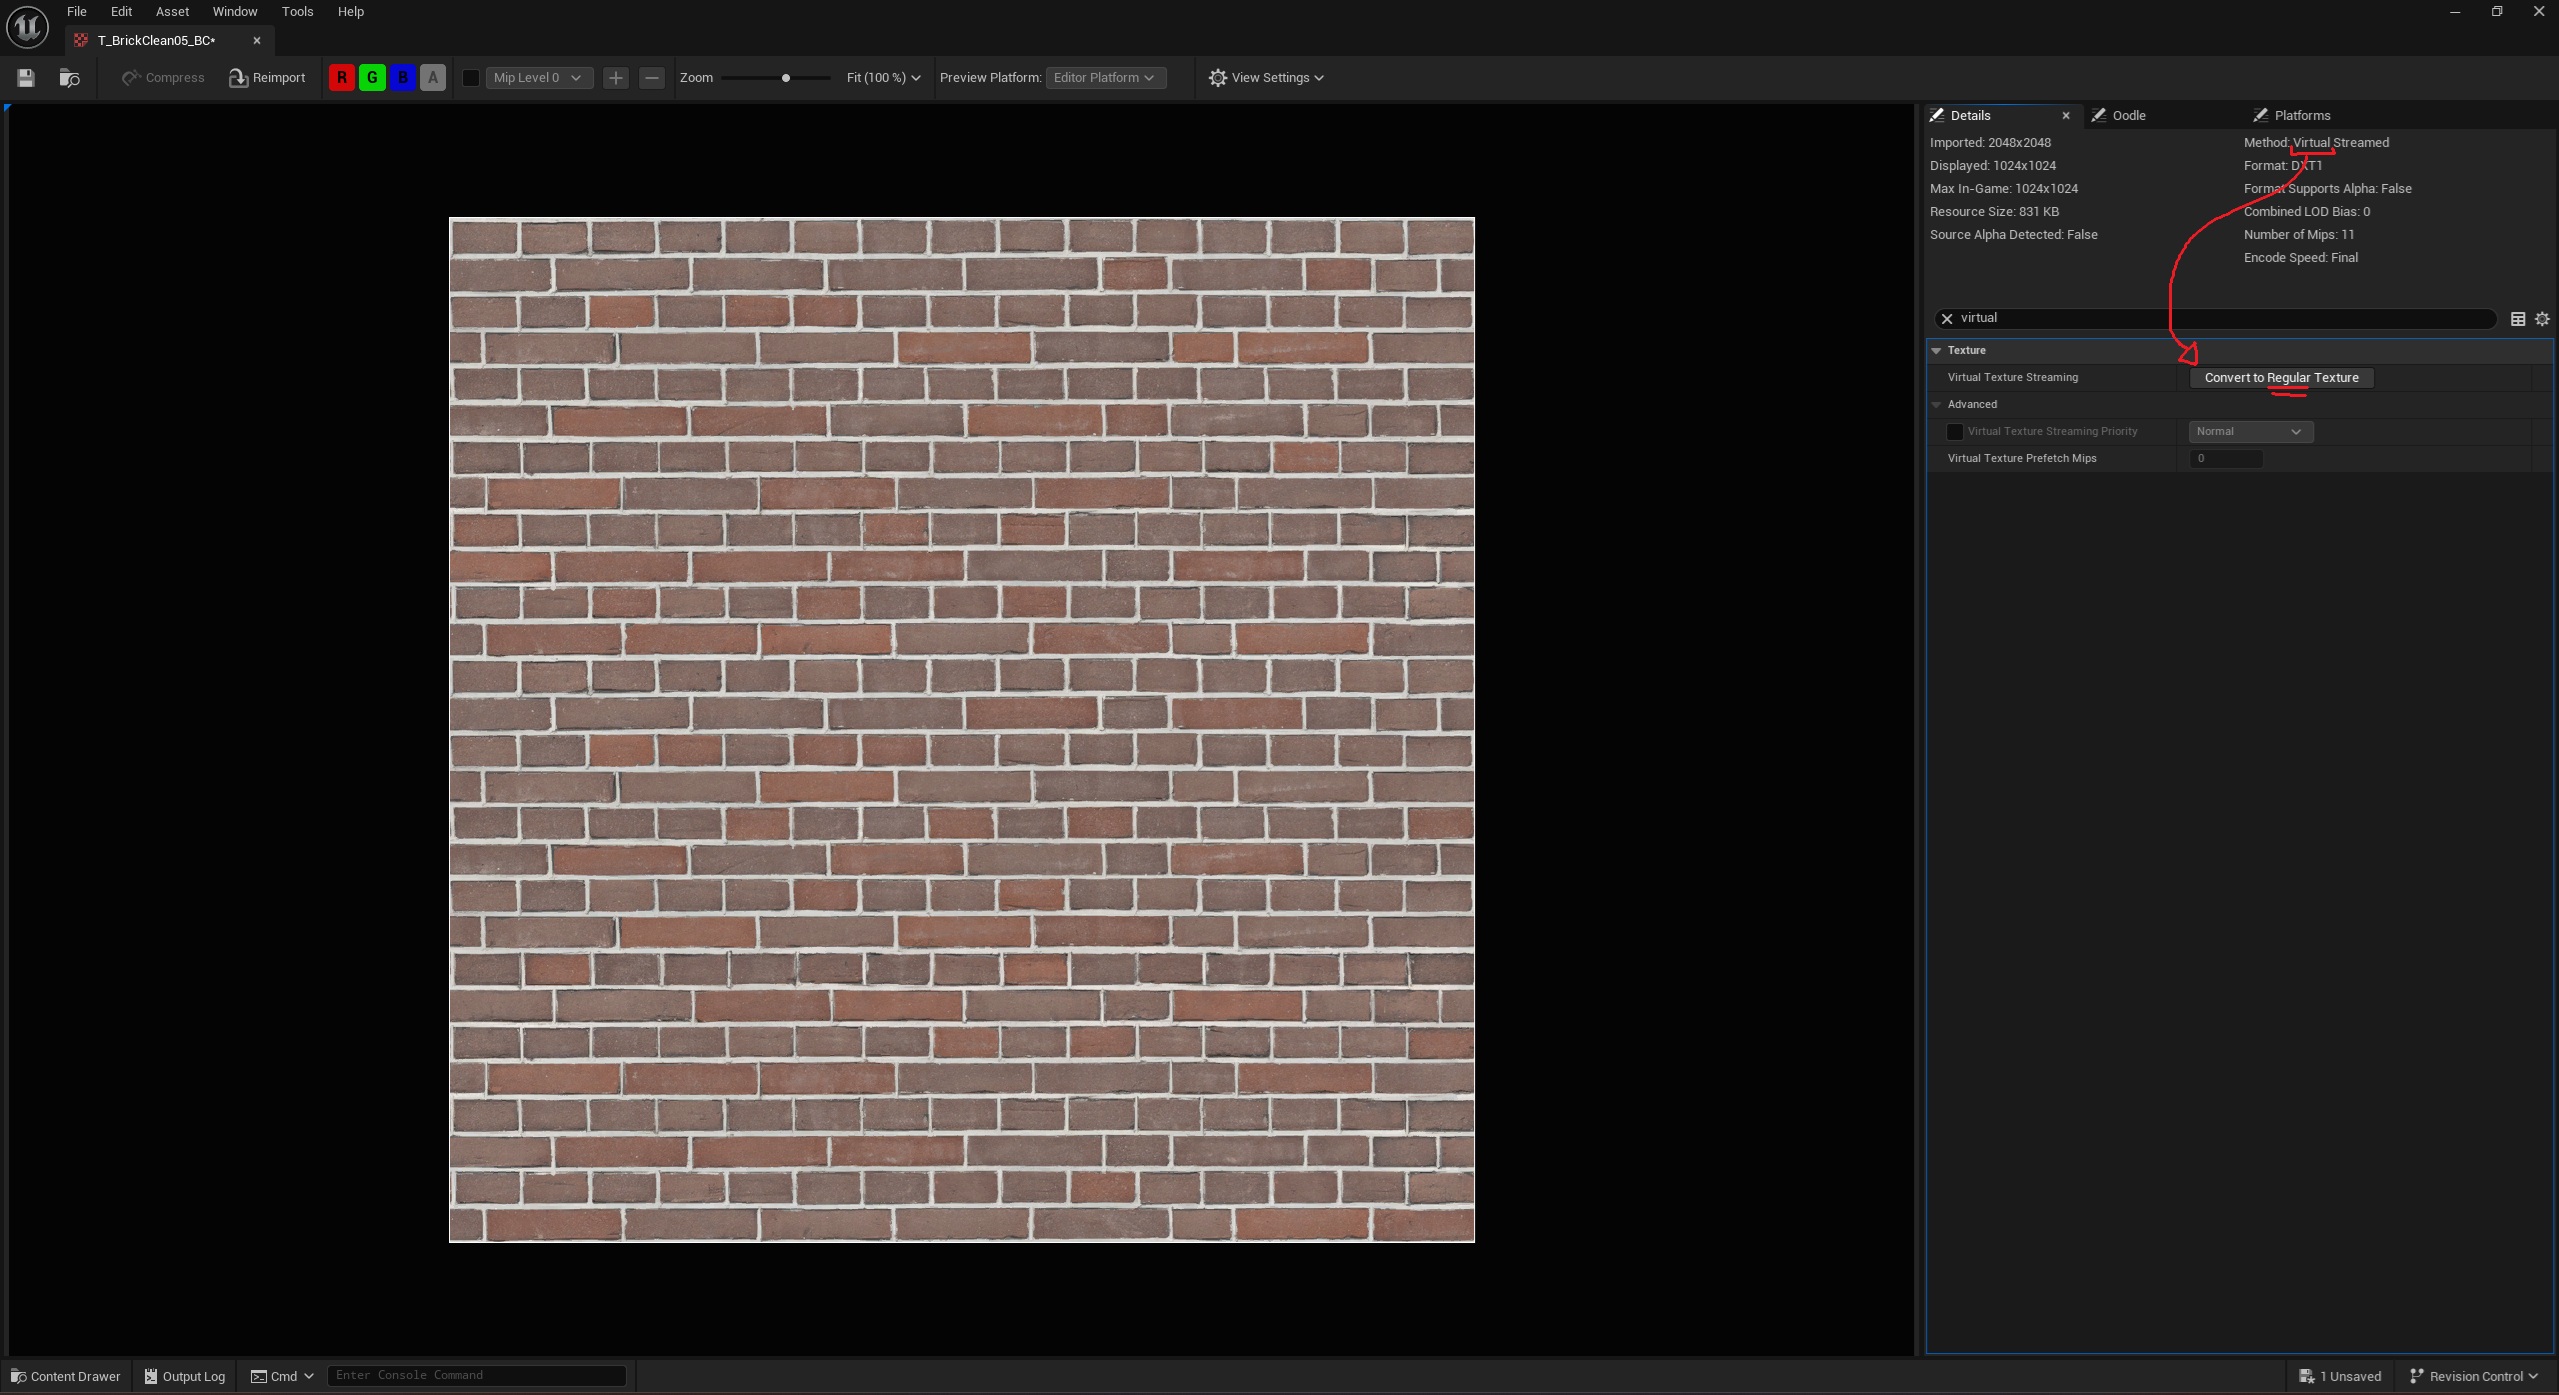
One last thing: if the texture is a “Virtual Texture,” it will say “Virtual Streamed” in the upper-right corner, but the game doesn't support virtual textures.
So, search for “Virtual Texture Streaming” in the search bar and click “Convert to a Regular Texture.” (If the texture is already a regular texture, don't set it to virtual.)